User Settings Reference
The User Settings module supports the following setting types:
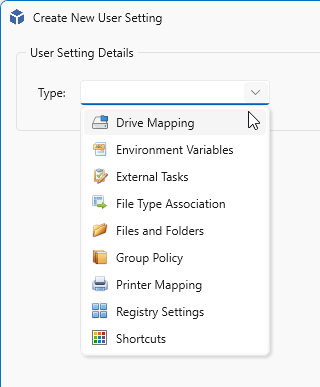
- Drive Mapping
- Environment Variables
- External Tasks
- File Type Association
- Files and Folders
- Group Policy
- Printer Mapping
- Registry Settings
- Shortcuts
See also Assignment and Folders.
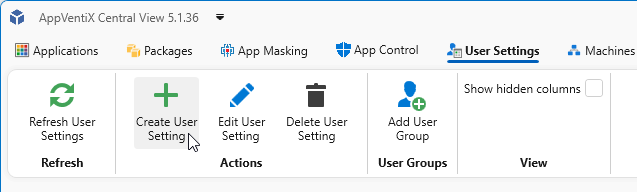
Navigate to the User Settings tab and click Create User Setting.
The Create New User Setting window will open. Select the setting type you want to configure.
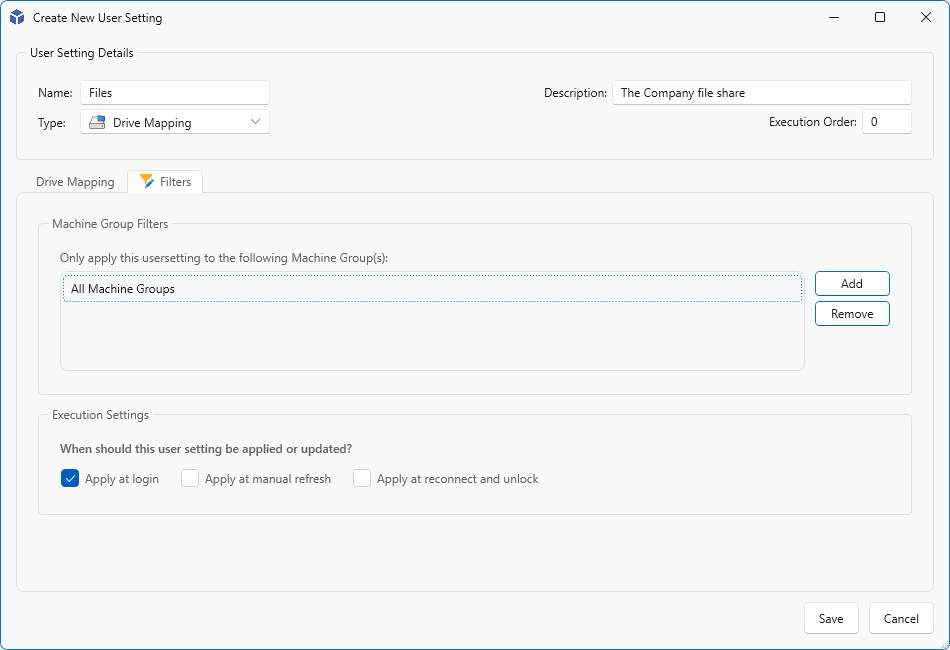
All setting types share the following common fields:
- Name - The name of the User Setting. This is a mandatory field.
- Description - An optional description for additional context.
- Execution Order - Controls the order in which settings are applied.

All setting types (except File Type Association) include a Filters tab. Here you can configure which Machine Groups a setting applies to. By default All Machine Groups is selected, which you can change as needed.
Drive Mapping
Drive Mapping lets you map network shares to a drive letter, or control what happens with a specific drive letter.
Drive Mapping specific settings:
- Drive Letter - The drive letter you want to configure.
- Network Path - Path to the network share to bind to the drive letter.
- Label - An optional label to assign to the drive.
- Options:
- Do not execute drive mapping - Use this if you only want to set a label for a drive letter without mapping a share. Select the drive letter, fill in the label, and save.
- Hide drive - Hides the specified drive letter. For example, to hide the D: drive, select "D:", check this option, and save.
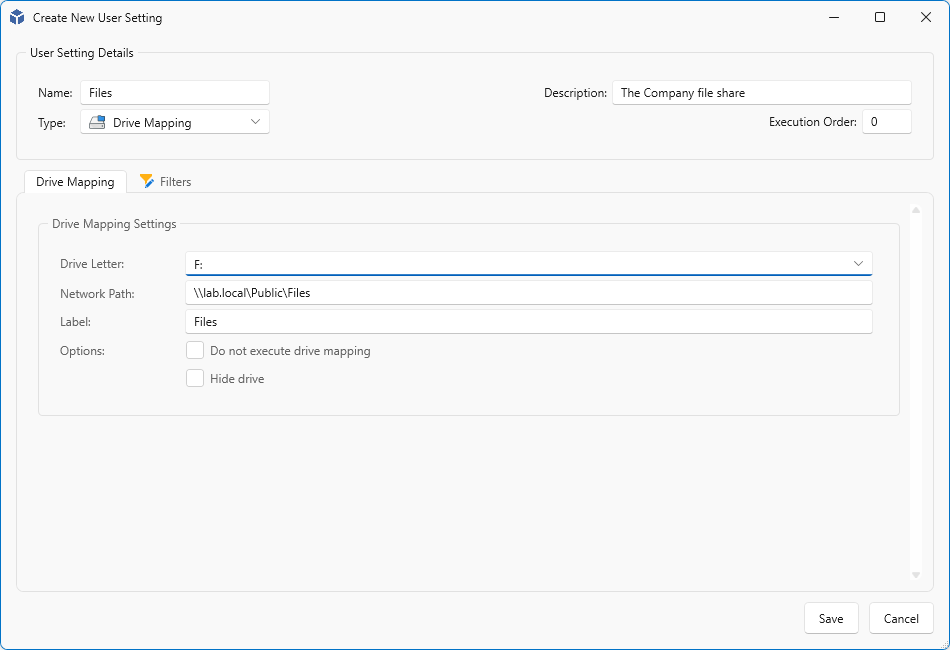
When done, click Save.
If not all Machine Groups have User Settings enabled yet, you may see a warning. Click Yes to continue. You can enable User Settings on other Machine Groups later when you are ready to promote settings to your production environment.
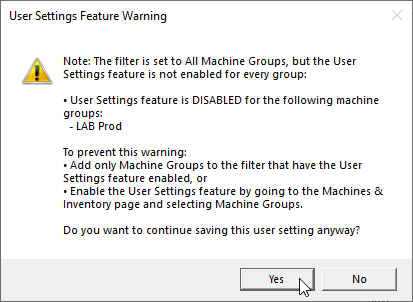
Click Ok on the Success popup message to continue.
Environment Variables
Environment Variables lets you create new user environment variables, replace existing ones, or append data to existing variables.
Environment Variables specific settings:
- Variable Name - The name of the environment variable.
- Value - The value to assign to the variable.
- Append to existing - When enabled, the value is appended to an existing variable rather than replacing it. Useful for adding entries to
%PATH%, for example.
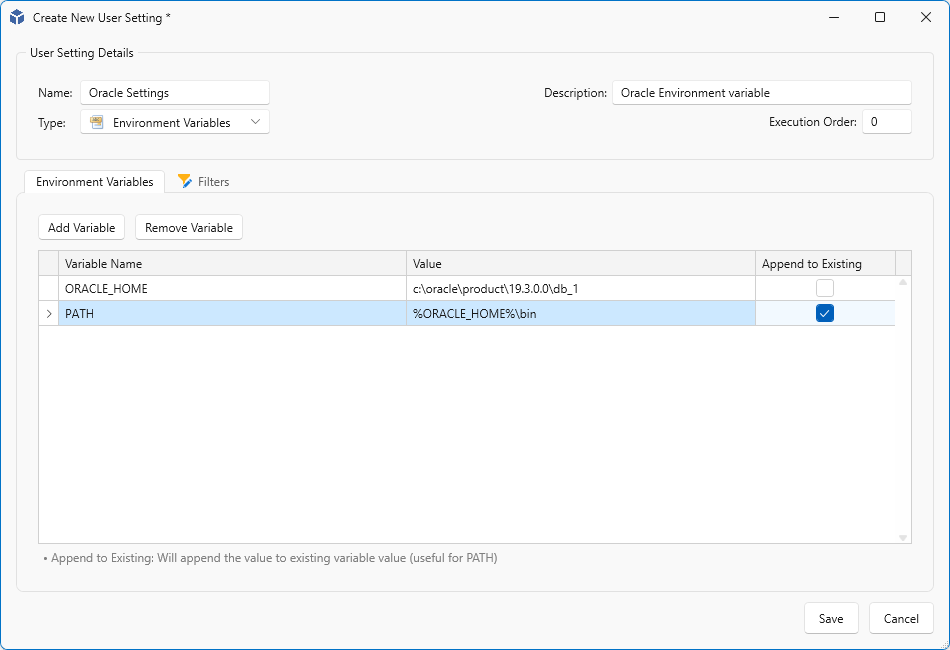
External Tasks
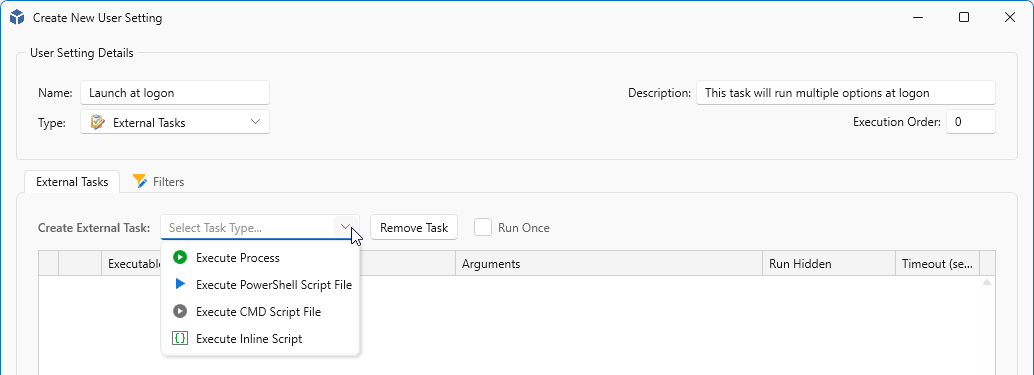
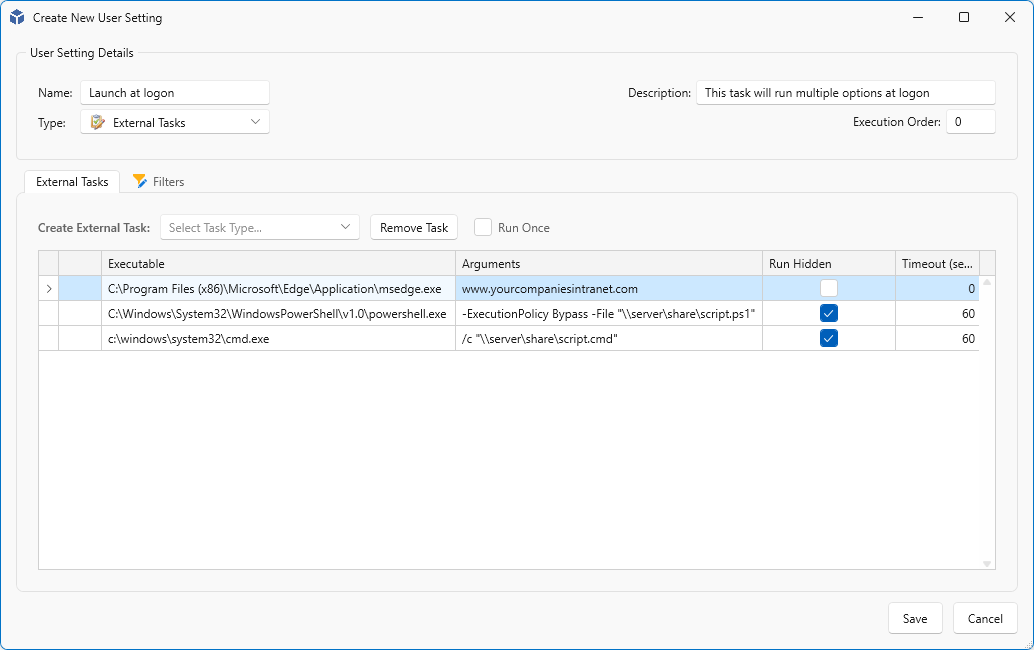
External Tasks lets you execute applications and scripts, for example to launch an intranet site or run a hidden script at the user's logon.
Four task types are available:
- Execute process - Launch an executable. By default pre-filled with the Microsoft Edge path, which you can change as needed.
- Execute PowerShell Script File - Pre-filled to run a PowerShell script file.
- Execute CMD Script File - Pre-filled to run a
.cmdor.batfile. - Execute Inline Script - Add scripts directly in AppVentiX, no file share required.
Use Remove Task to remove a selected task from the list. Check Run Once to execute the setting only once per user.
Note
You do not have to wrap the path in double quotes, just enter the path and executable as is.
Note
To reset Run Once and allow the task to run again, duplicate the User Setting and delete the original.
Each entry can be edited after it is added. For example, to use pwsh.exe instead of powershell.exe, set the executable to:
If the -File parameter does not work, for example when AppLocker is in use or you need to pass parameters, use -Command instead:
-NonInteractive -Command "& '\\fileserver.domain.local\share$\Scripts\Start-ThisScript.ps1' -Param1 Value1 -Param2 Value2 -EnableLogging"
To run the script or executable hidden, check the Run Hidden column. Use the Timeout field to set the maximum allowed run time in seconds. If the process is still running when the timeout expires, it will be terminated. Make sure the timeout is set to at least the expected run time of your script.
Note
Scripts within the same User Setting are executed sequentially, from top to bottom. User Settings with the same Execution Order number are executed simultaneously.
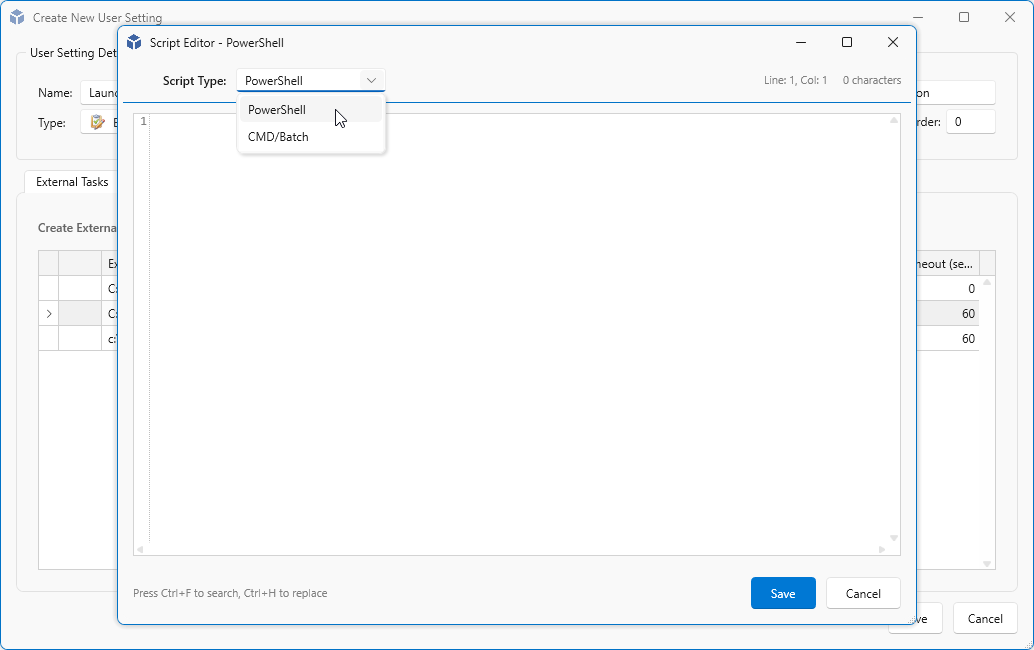
With the fourth type Execute Inline Script, you can add scripts directly in AppVentiX without needing a file share.
File Type Association
File Type Association lets you configure which application opens a specific file extension.
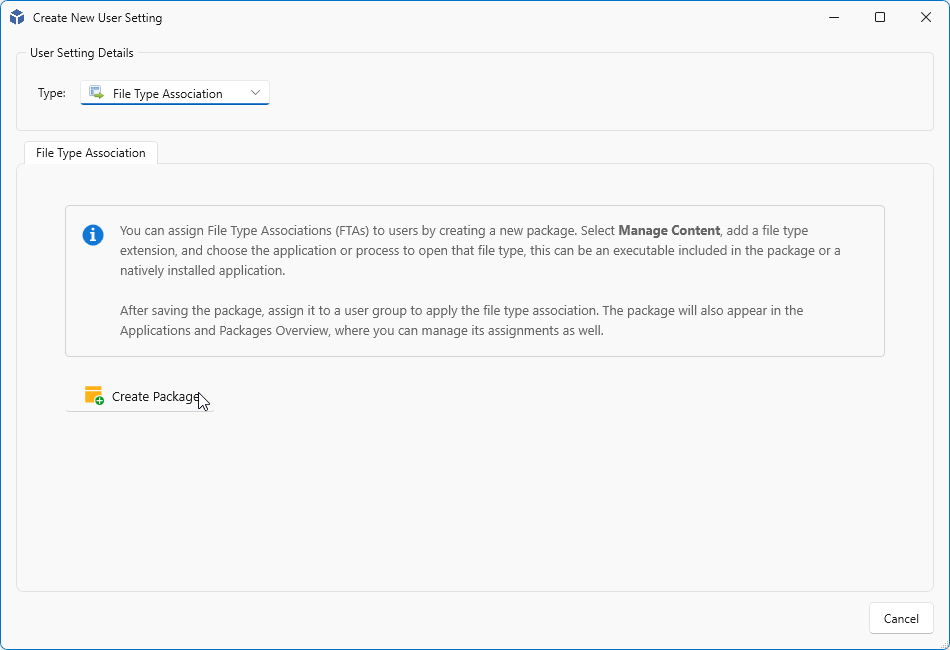
This setting type works differently from the others. File Type Associations are packaged as an MSIX package. Click Create Package to start.
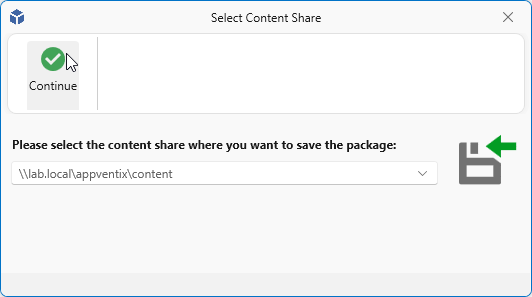
If you have multiple content stores configured, select the location where the package should be created and click Continue.
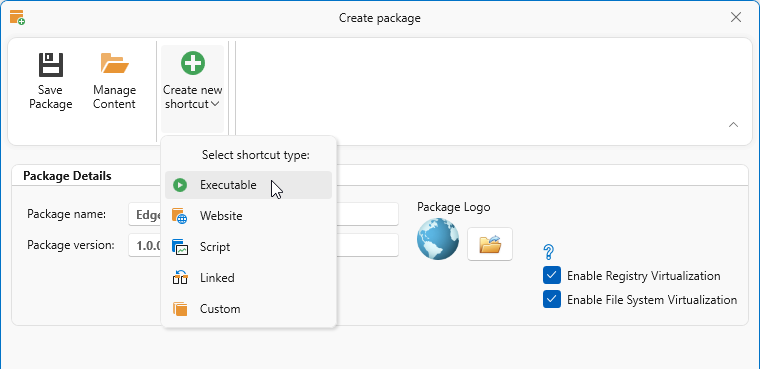
Enter a name for the package in the Package name field. Make sure the name does not contain spaces. Optionally change the version at Package version. Click on the Create new shortcut menu item and choose Executable.
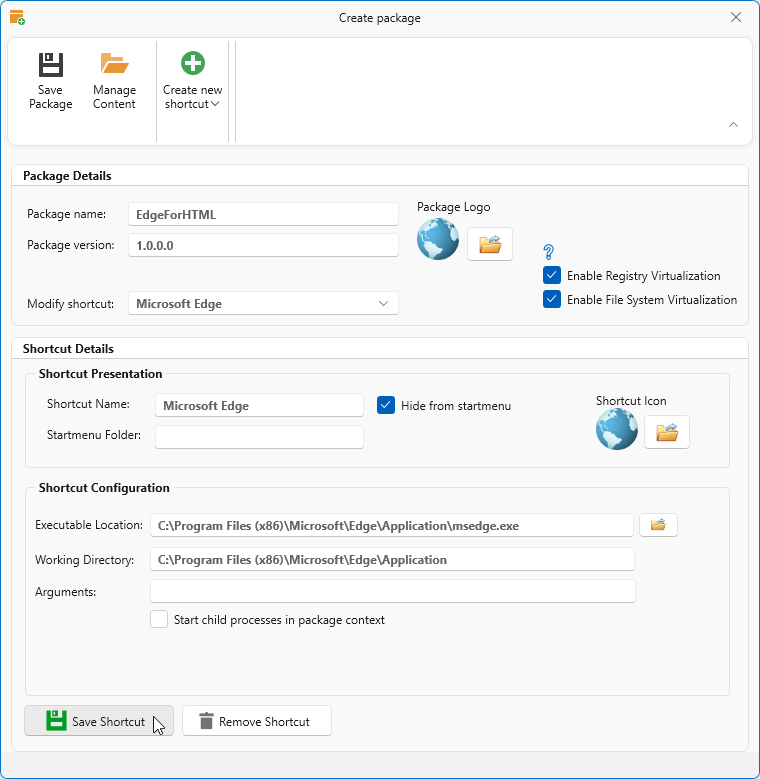
Give the application (shortcut) a name at Shortcut Name and select Hide from startmenu if you don't want to show this shortcut in the Startmenu. Select the Executable Location, provide a Working Directory if you need to change the default. And optionally add Arguments. Click Save Shortcut to save the shortcut.
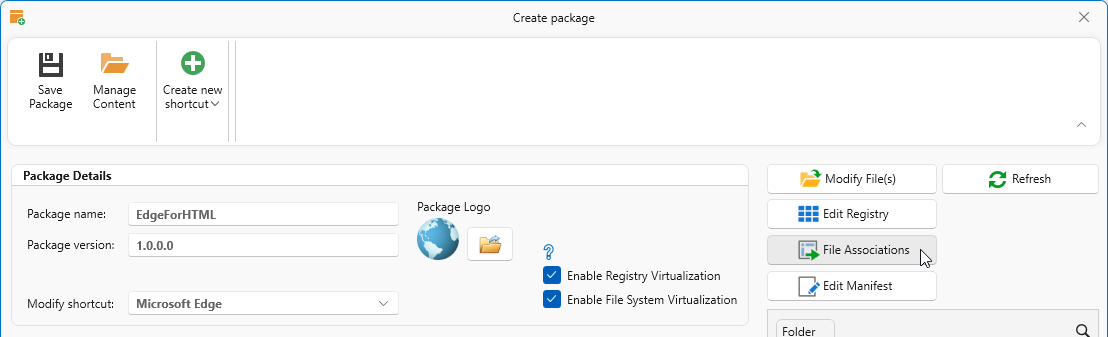
Click the Manage Content button. A new column will appear where you can click the File Associations button.
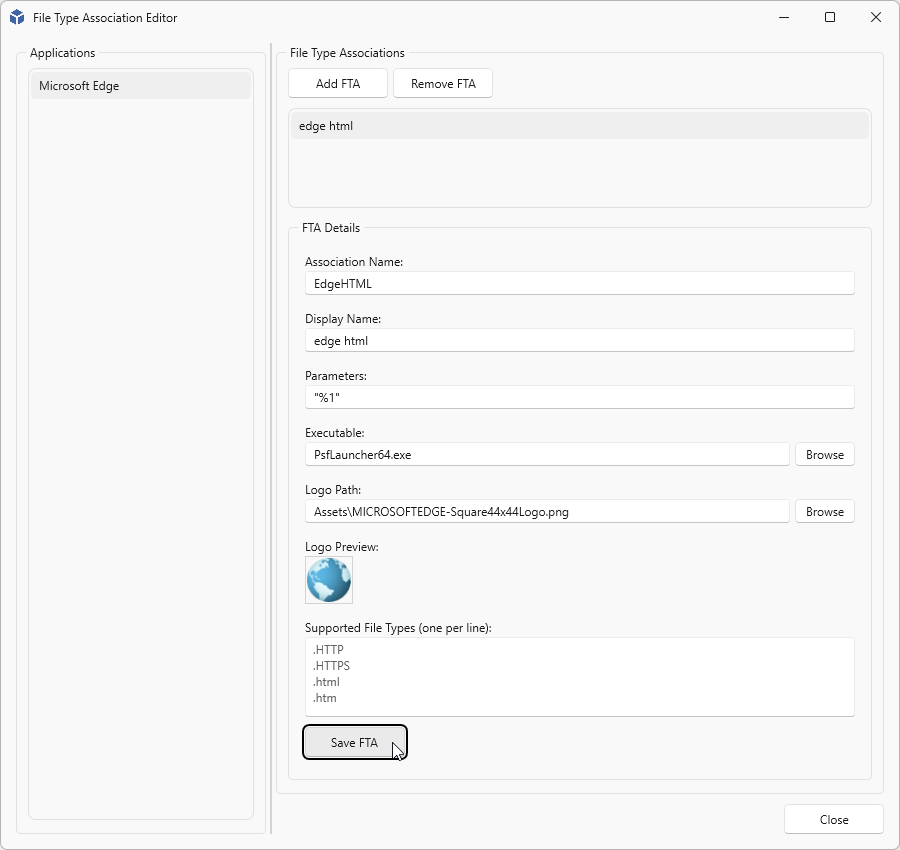
Select the application in the left column and click Add FTA under File Type Associations.
Provide an Association Name (No spaces allowed only the following characters _, -, a-z, A-Z or 0-9) and leave the Executable on the default value of "PsfLauncher64.exe". Add the file type associations you need and finally click Save FTA. When finished, click Close.
When you have added your FTA details, click the Save Package button in the toolbar.
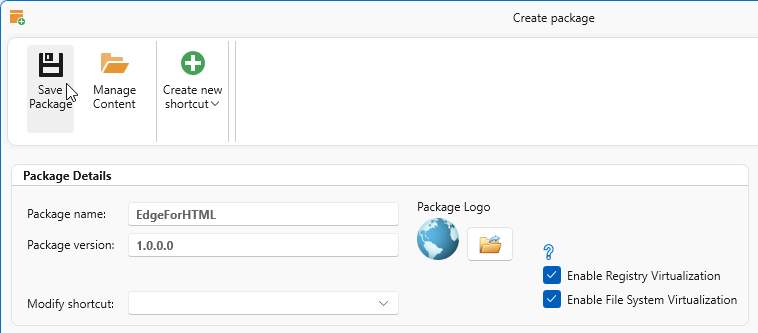
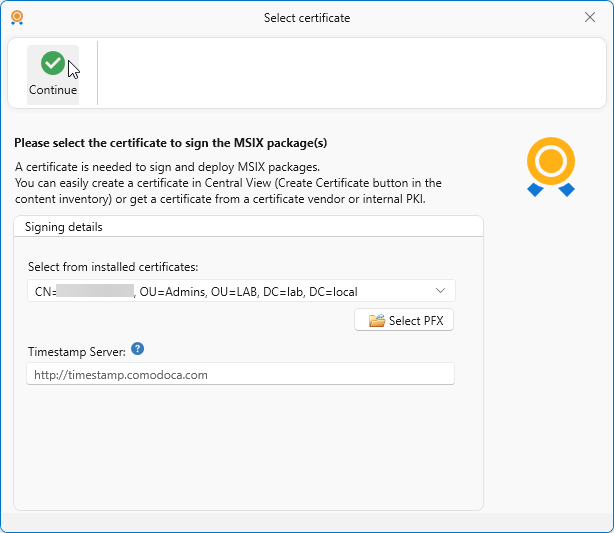
All MSIX packages must be signed. Select the code signing certificate to use. If you only have one, it will already be selected. When finished, click Continue.
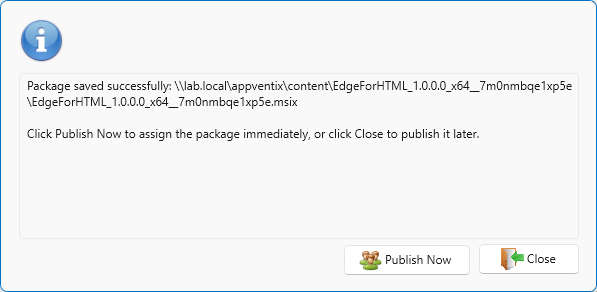
Finally, choose one of two options:
- Publish Now - Create a publishing rule to publish the package directly to your users.
- Close - Save the package without publishing, to publish it later.
Files and Folders
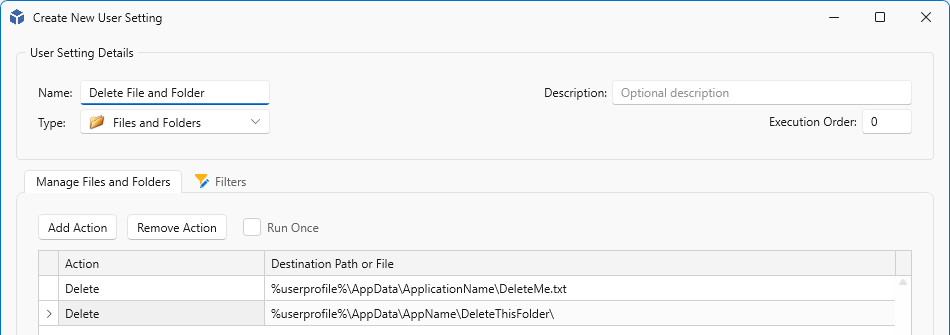
Files and Folders lets you copy or delete one or more files and folders.
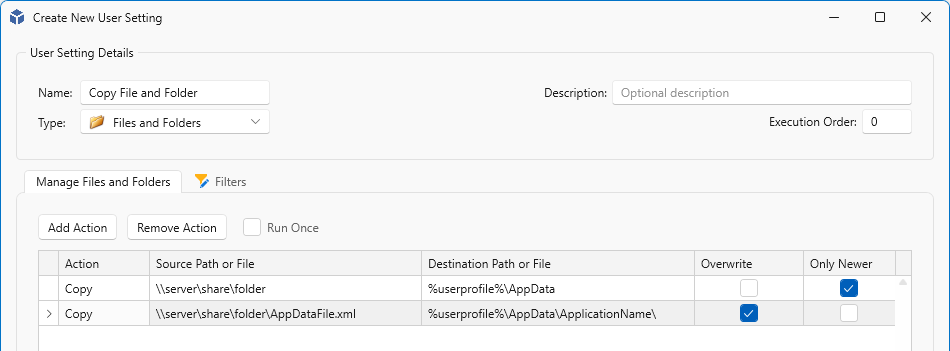
You can add one or more actions, and for each action choose either Copy or Delete. As a best practice, keep Copy and Delete actions in separate User Settings. The Run Once option is also available here.
For Copy actions, specify a Source Path or File and a Destination Path or File. You can choose to always overwrite the destination, or only when the source file is newer.
When Delete is selected, only a single field is shown to enter the path or file to delete.
Group Policy
Group Policy lets you apply Group Policy settings to your users and assign policy sets to all users or to specific groups.
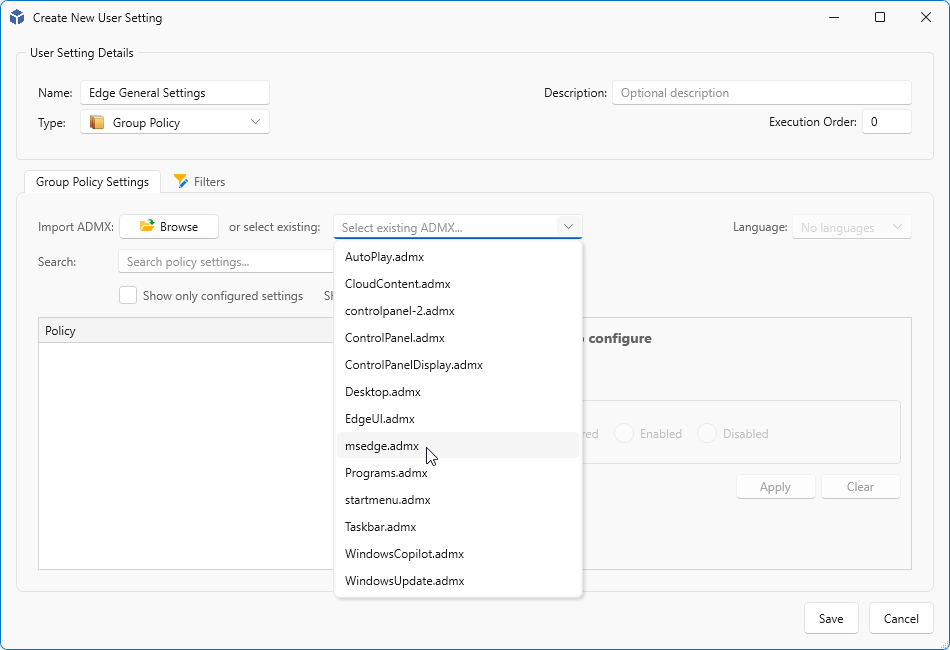
To get started, click Browse and select an ADMX file. Make sure the corresponding ADML file is in the same folder or in a language subfolder. The selected ADMX file will be uploaded to the content store. For subsequent policies from the same ADMX file, you can select it from the existing ADMX list.
Tip
You can find the Windows ADMX/ADML files in the following locations:
C:\Windows\PolicyDefinitions\\<domain.local>\SYSVOL\<domain.local>\Policies\PolicyDefinitions
Note
Only settings from one ADMX file can be configured per Group Policy User Setting.
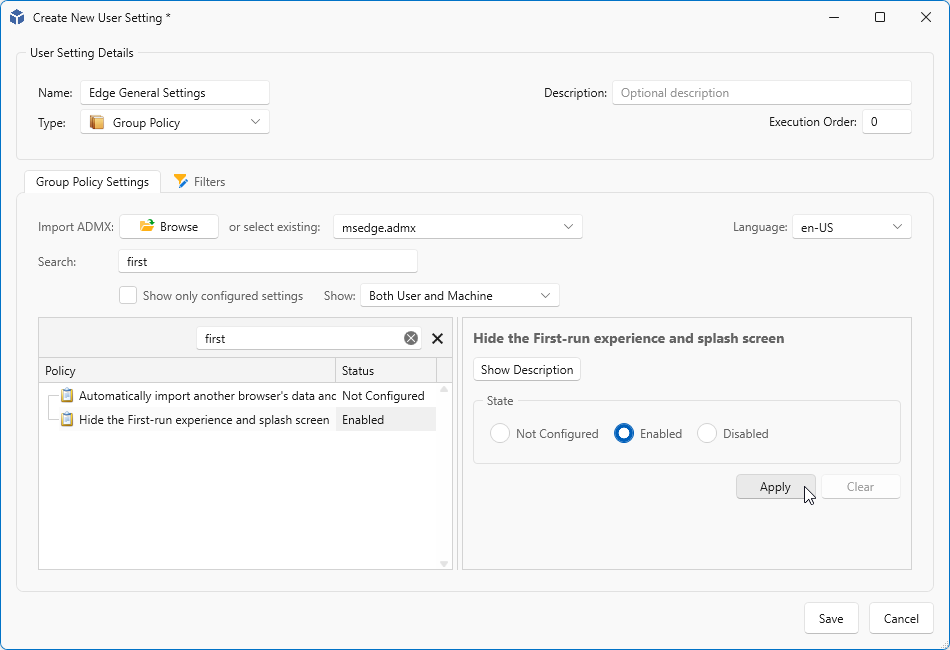
Once an ADMX file is selected, use the search bar to filter settings by keyword. Check Show only configured settings to display only settings that have been enabled or disabled. Use the Show dropdown to switch between User, Machine, or Both policy scopes.
When changing a policy setting, click Apply to apply the change, then click Save when you are done.
Note
Machine level policies are not applied before the user logs in. They are applied during login, in the user's context.
Printer Mapping
Printer Mapping lets you assign printers to your users.
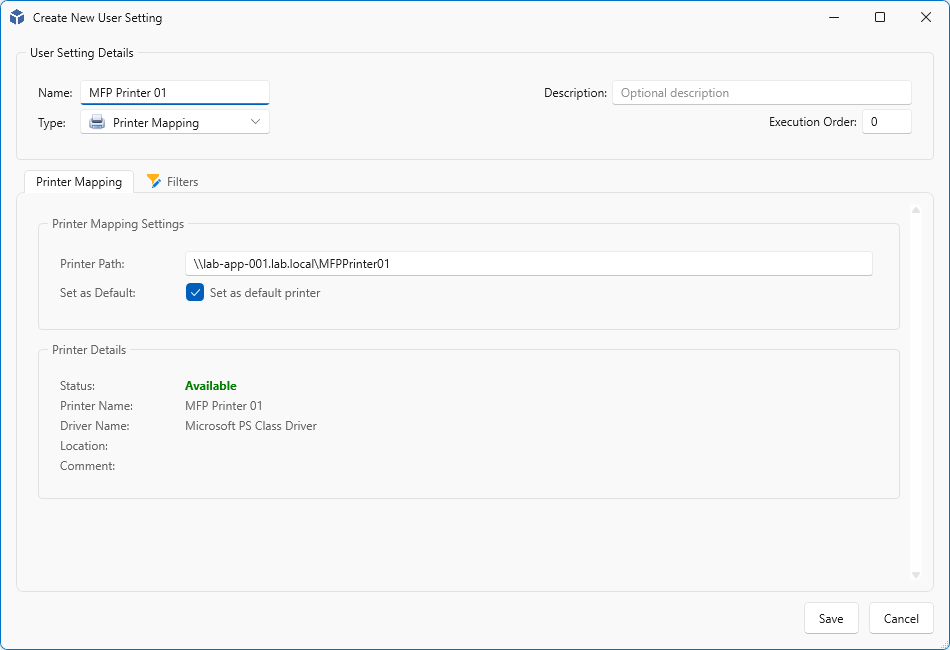
Enter the print server FQDN and printer share in the Printer Path field. If your account has access to the printer share, the printer details will be automatically fetched and filled in the Printer Details field.
To set the printer as the default for your users, check the Set as default checkbox.
Registry Settings
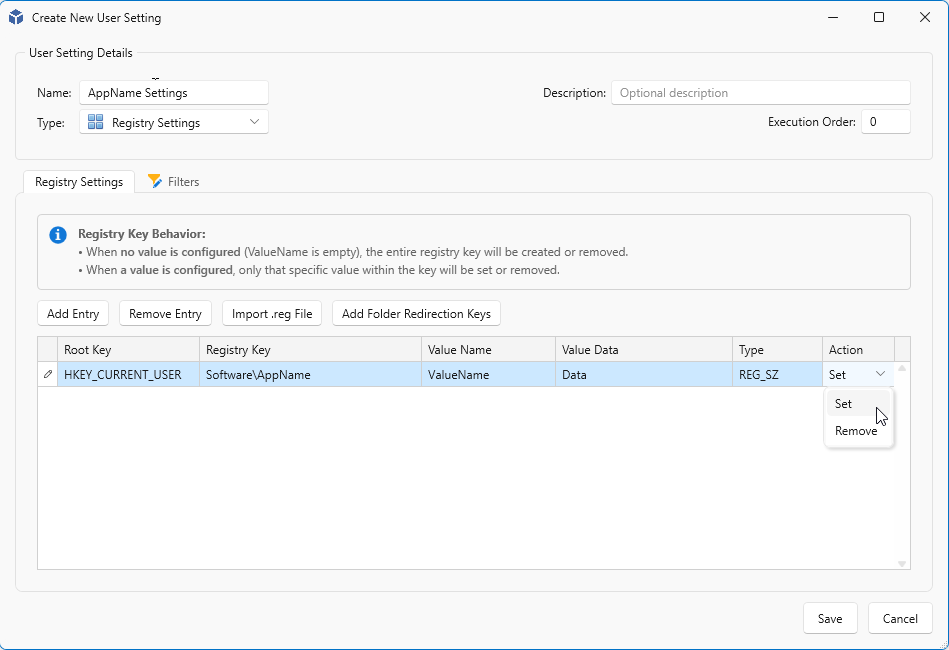
Registry Settings lets you create, edit, or delete registry keys and values. You can add entries manually, import a .reg file, or start from a set of default values.
- Click Add Entry to add a new entry.
- Click Remove Entry to remove a selected entry.
- Click Import .reg File to import from a
.regfile.
For each entry you have the following options:
- Root Key - HKEY_CURRENT_USER or HKEY_LOCAL_MACHINE
- Registry Key - The path of the registry location.
- Value Name - The name of the registry value.
- Value Data - The data to store in the registry value.
- Type - REG_SZ, REG_EXPAND_SZ, REG_DWORD, REG_QWORD, REG_BINARY, or REG_MULTI_SZ
- Action - Set to create or replace a value, Remove to delete it.
Note
If Value Name is left empty, the entire registry key will be created or removed.
Shortcuts
Shortcuts supports two options for creating shortcuts for your users:
- Native - Standard shortcuts added to the Start menu or desktop.
- MSIX - Shortcuts packaged as an MSIX package, which can then be published to your users.
Native Shortcuts
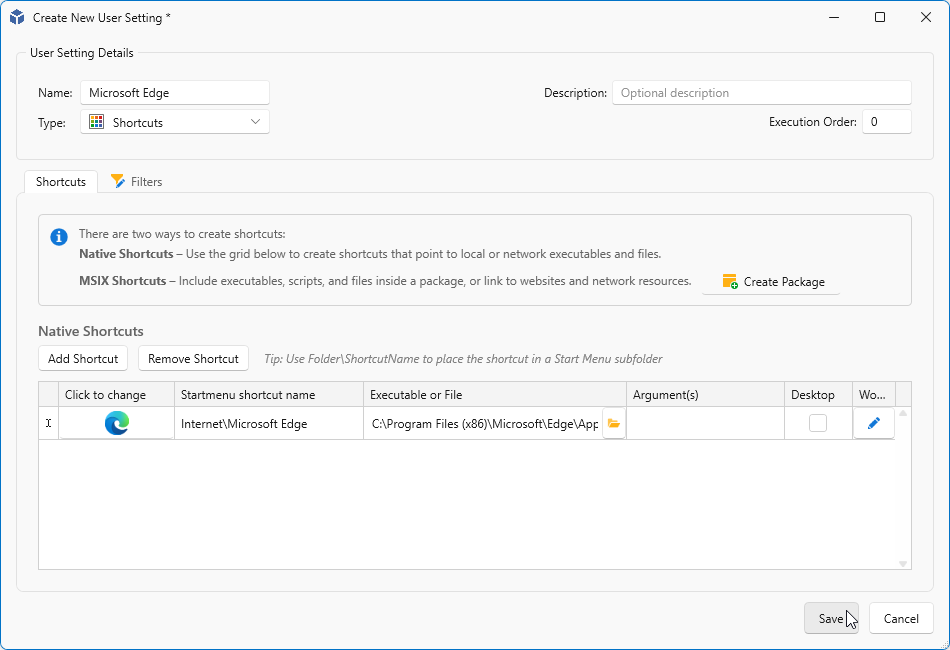
Native Shortcuts lets you add or remove shortcuts in the Start menu or on the desktop. Click Add Shortcut to add a new entry. Select an entry and click Remove Shortcut to remove it.
For each entry you have the following options:
- Click to change - Change the icon for the selected entry.
- Start menu shortcut name - The name of your shortcut. Prefix with a folder name to place the shortcut in a subfolder.
- Executable or File - The target of your shortcut.
- Argument(s) - Optional arguments for the executable.
- Desktop - Check this to also add the shortcut to the desktop.
- Working Dir - Optional working directory for the shortcut.
MSIX Shortcuts
To create an MSIX shortcut, click Create Package. The current window will close and a new window will open where you can select the content store where the package will be created.
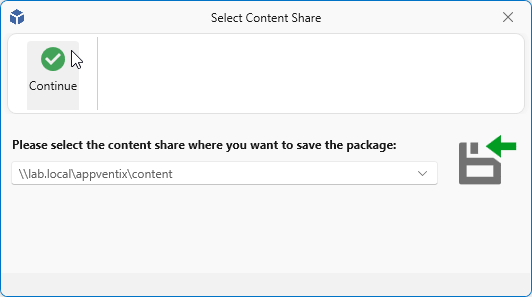
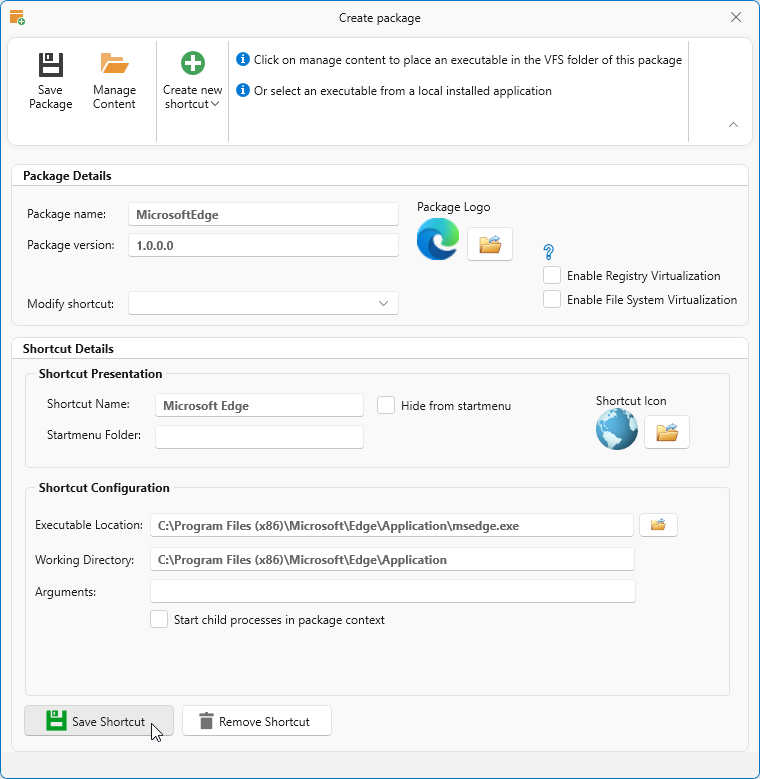
In the next screen, provide a name for the package. Optionally uncheck Enable Registry Virtualization and Enable File System Virtualization. Click Create new Shortcut and select your shortcut target. In this example we are using an Executable.
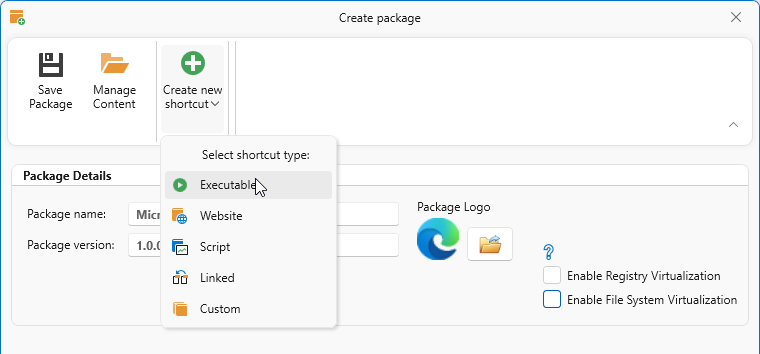
Fill in the shortcut details. Enter a Shortcut Name and optionally a Start menu folder name. Select the executable by browsing or entering the path in the Executable Location field. Optionally add arguments. When finished, click Save Shortcut.
Note
The package name cannot contain spaces.
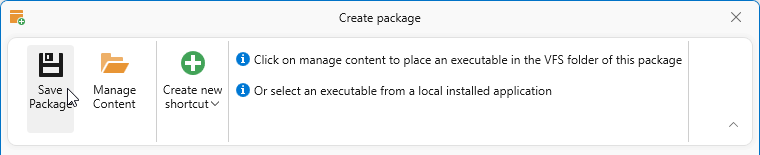
You can add more shortcuts or other shortcut types as needed. When finished, click Save Package.
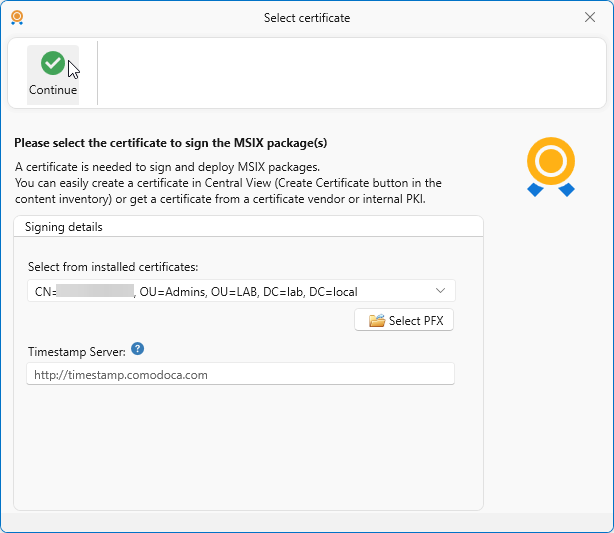
All MSIX packages must be signed. Select the code signing certificate to use. If you only have one, it will already be selected. When finished, click Continue.
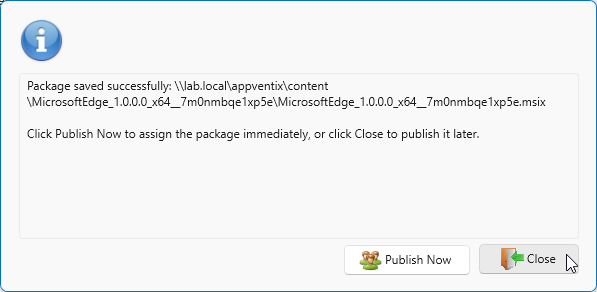
Finally, choose one of two options:
- Publish Now - Create a publishing rule to publish the package directly to your users.
- Close - Save the package without publishing, to publish it later.
Assignment
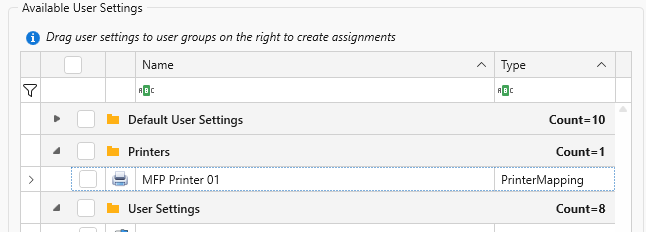
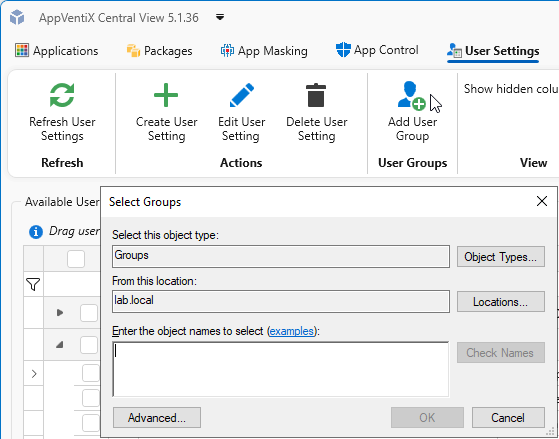
Once your User Settings are created, you can assign them to your users. Settings can be assigned to Everyone, a group, or an individual user. Everyone is added by default and cannot be removed. To add a group or user, click Add User or Group in the toolbar. The selected object will appear in the User Group Assignments pane.
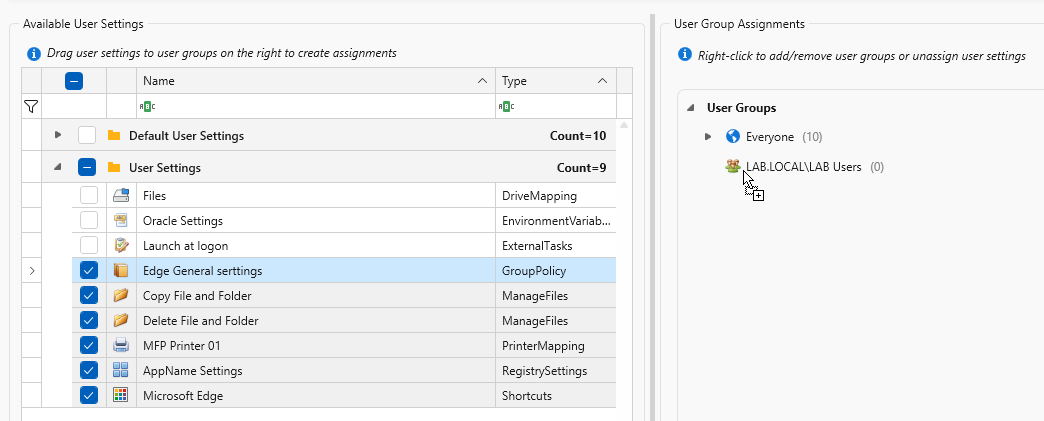
Select one or more items and drag them to the group you want to assign them to.
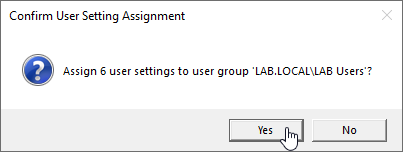
Confirm the changes by clicking Yes, or click No to cancel.
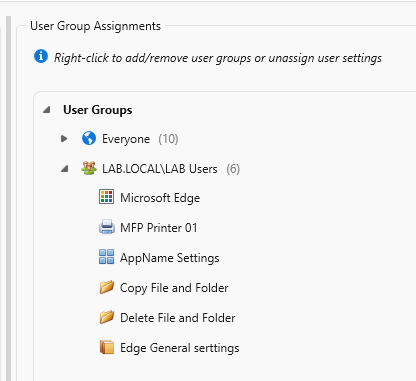
All your assignments are visible in the User Group Assignments pane.
Folders
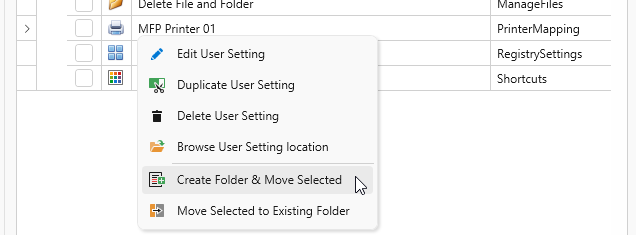
Over time your list of User Settings can grow. To keep things organized, you can group settings into folders. Select one or more items, right-click, and choose Create Folder & Move Selected from the context menu.
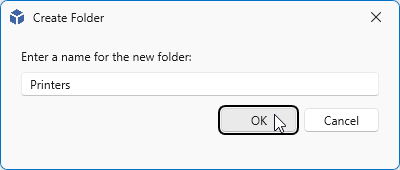
Enter a name for the folder and click OK.
The selected items are moved to the newly created folder.