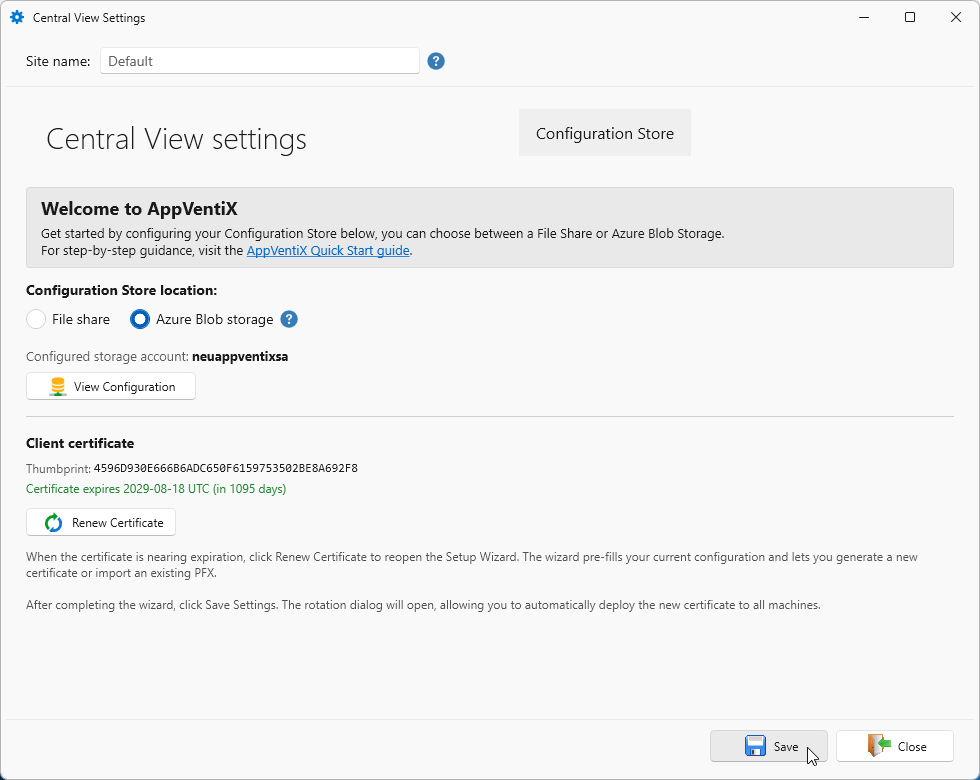
Azure Blob storage configuration
With a Azure Blob storage it's possible to store configuration settings securely and make it available for your clients outside of your network. With Azure Blob storage you don't have any dependency with Active directory or challenges you might experience with SMB shares.
If you want to create a (new) separate site to start with, check this page out first.
To start the (initial) configuration, click the Setup Wizard
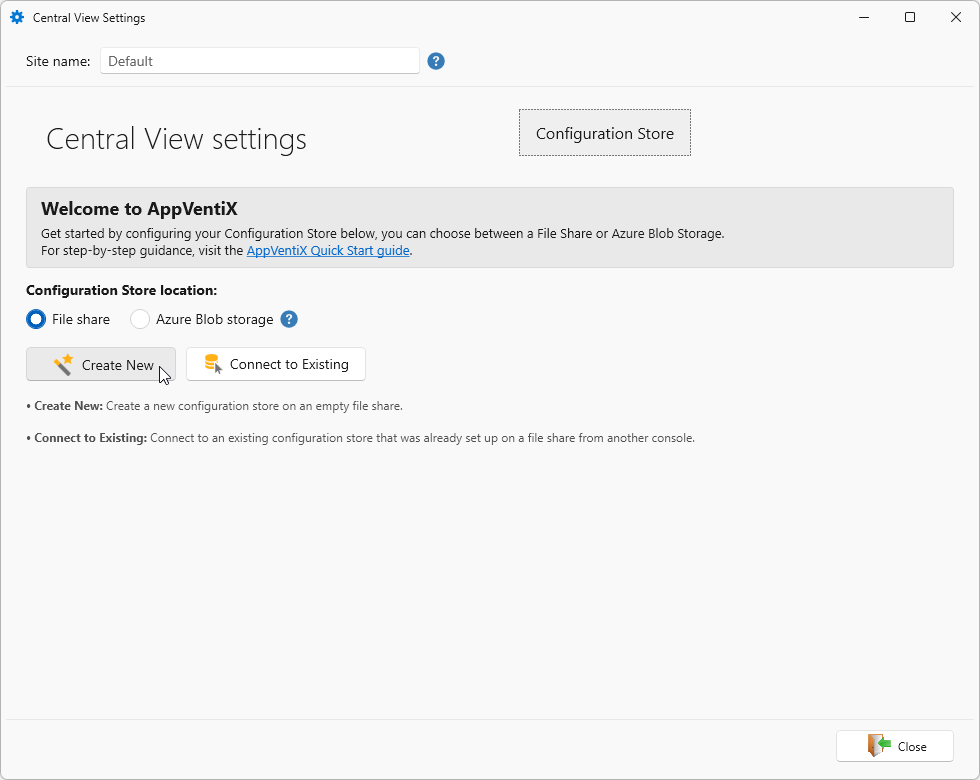
You have two options for configuring:
Create New
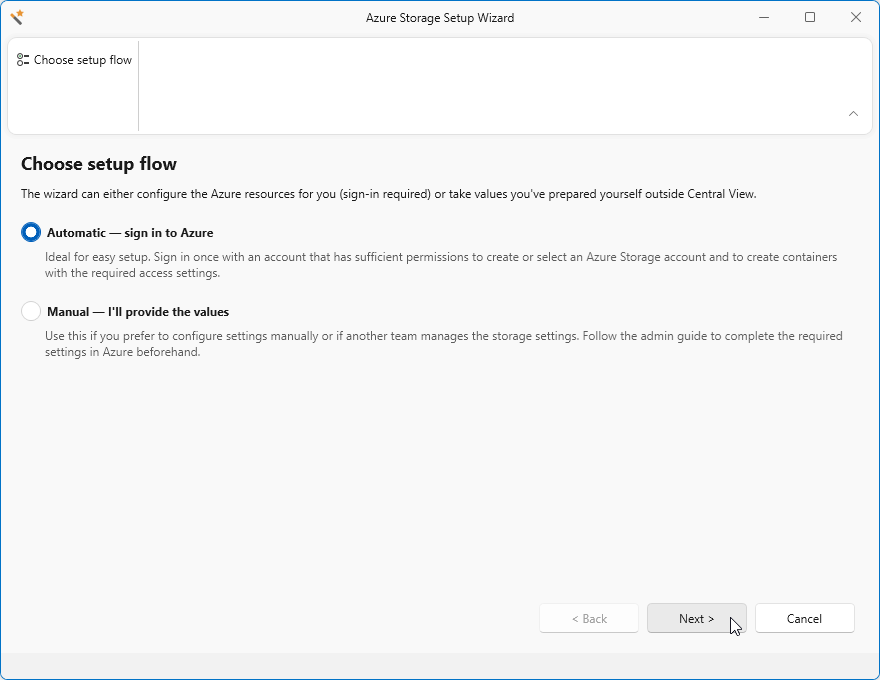
With the create new you have two options, by default Automatic - ... is selected. The manual option is also available.
Automatic setup
With the automatic option, AppVentiX will do all the configuration for you.
To continue, you account needs at least one of the following (subscription) roles
- Owner
- Contributor + User Access Administrator
Select Automatic - sign in to Azure
 !
!
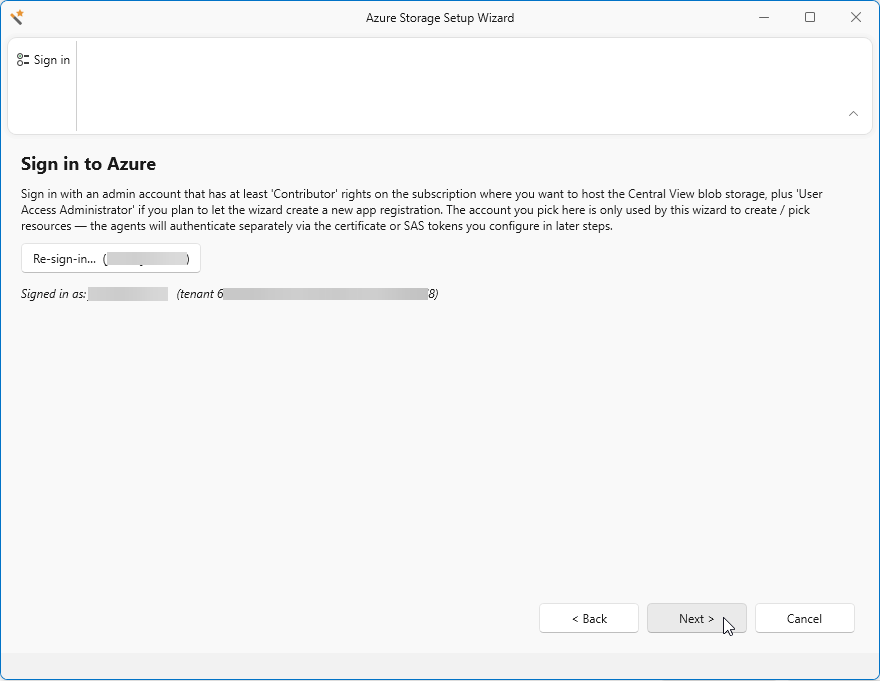
Click Sign in to Azure...
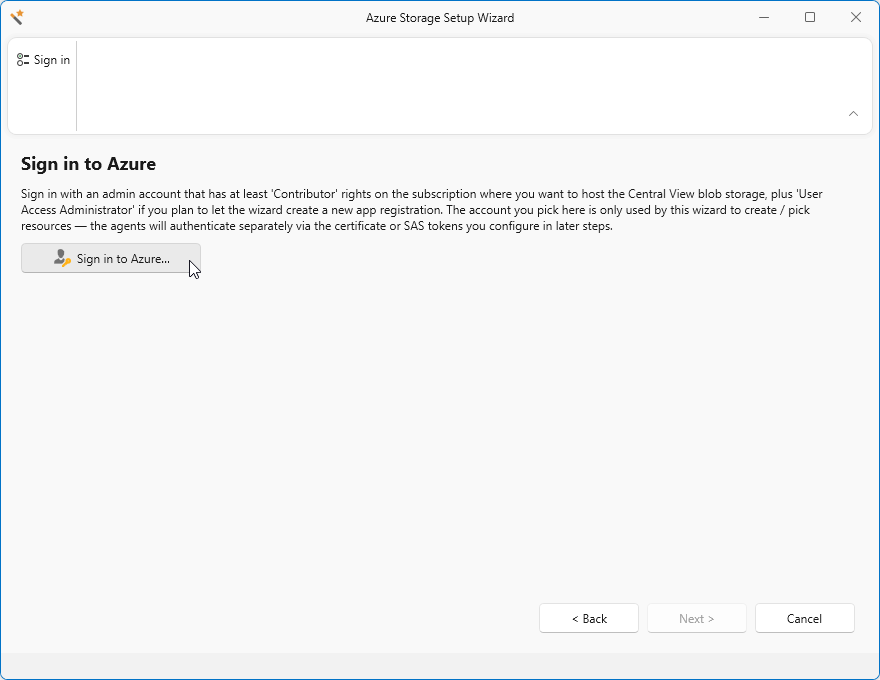
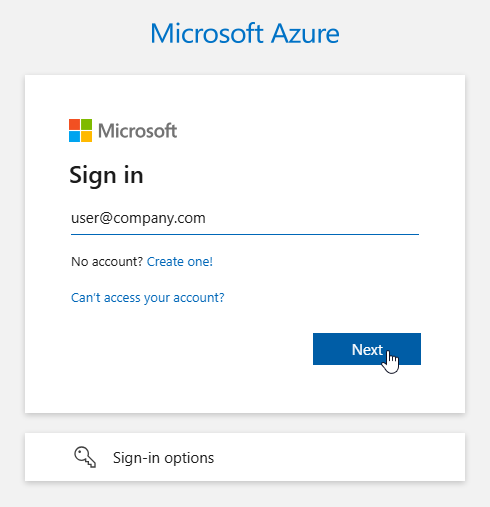
A browser popup will appear for you to sign in with your company credentials, log in.
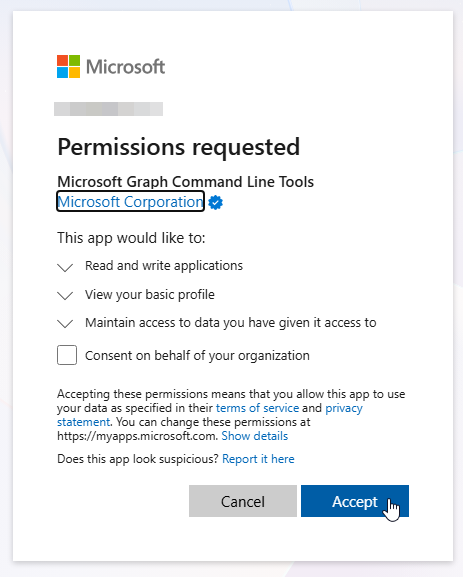
A Permissions requested dialog may appear, requesting for Microsoft Graph Command Line Tools permissions. Click Accept to continue.
When login is successful, you can close the browser and continue in AppVentiX Central View.

Click Next to start the storage account creation.
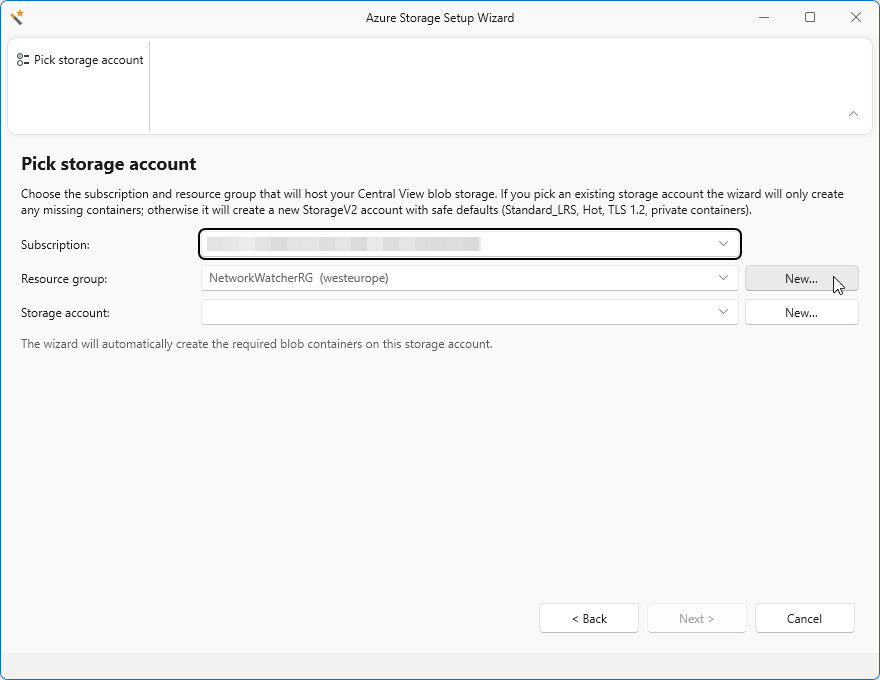
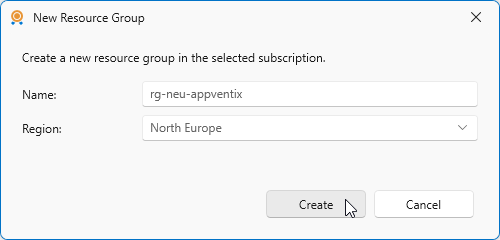
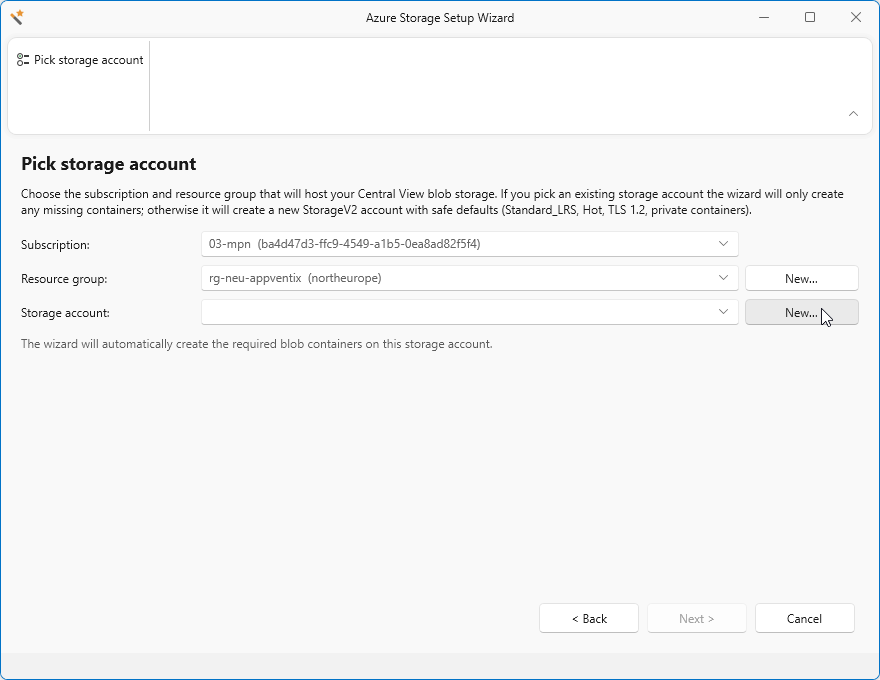
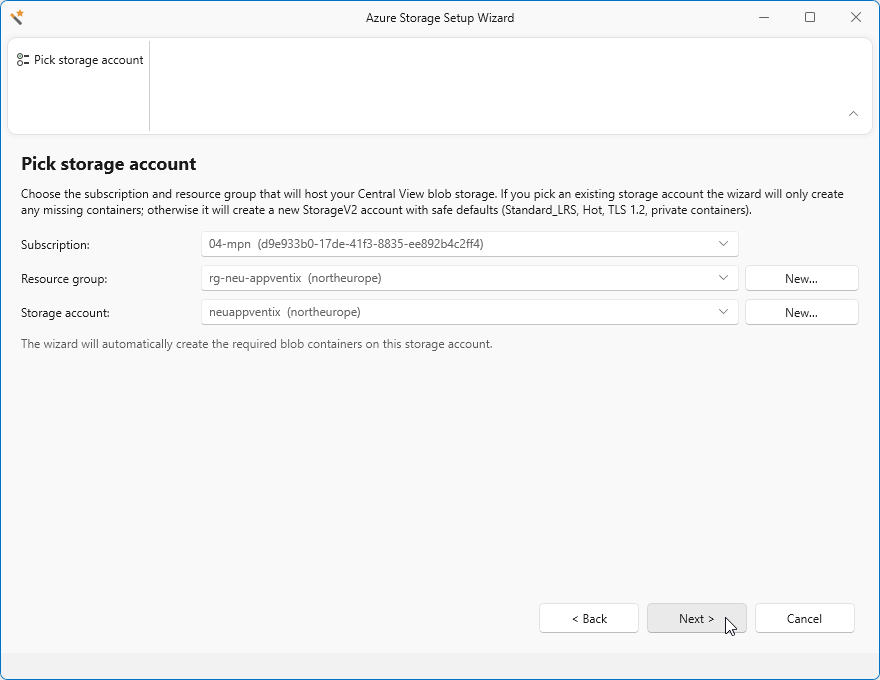
Select the subscription you want to use for the Storage Account. Next, select an existing Resource Group or click New to create a new Resource Group for the storage account.
Enter a Resource Group Name and select a Region. Click Create when you are ready.
Click New to create a new Storage Account.
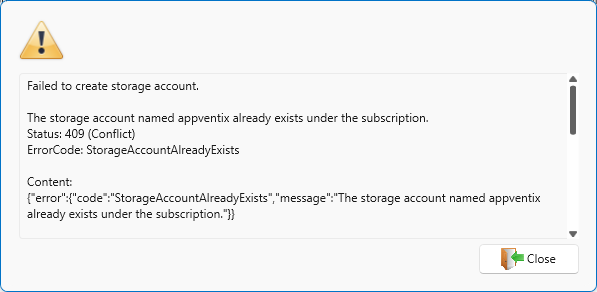
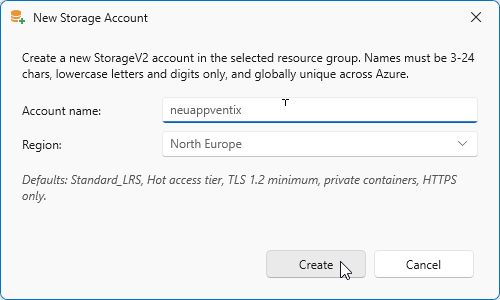
Enter a unique storage account name. If you enter a name that already exists, you may be presented with a warning message.
Click Create to start the creation of the Storage Account, this can take a short time. During this period, the Storage Account is created, permissions are set and blob containers are created.
Click Next
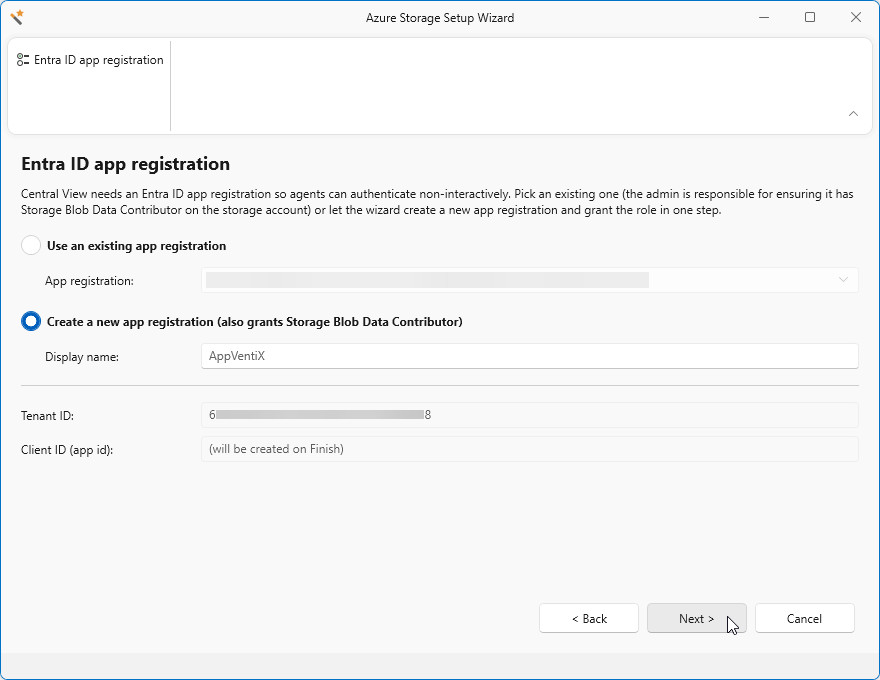
A new App Registration will be created by default with the correct required permissions. You can change the Display name according to your companies policy.
To Use an existing app registration you can create your own App Registration. You can follow this guide to configure your own App Registration.
Note
After Automatic App Registration creation, Storage Blob Data Contributor role will be assigned to it.
Click Next to start this process.
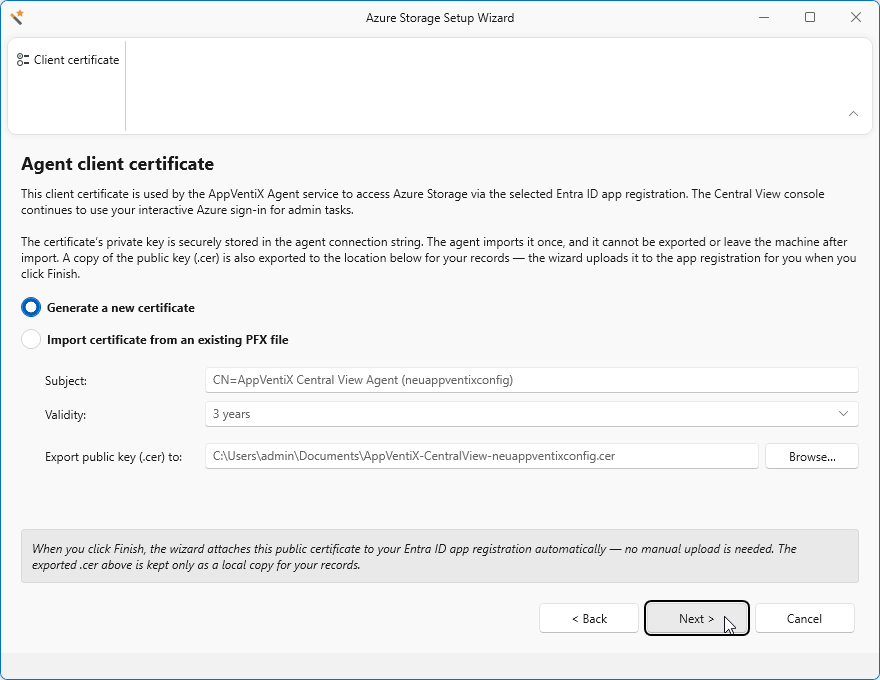
On the next screen, an Agent client certificate will be created. AppVentiX (Central View and Agents) will use this certificate to authenticate to the Storage Account. You can however select your own pxf certificate
The default validity is 3 years, you can change this accordingly.
Note
The Public key will be automatically configured, no manual action is required. The public key saved is for your records only.
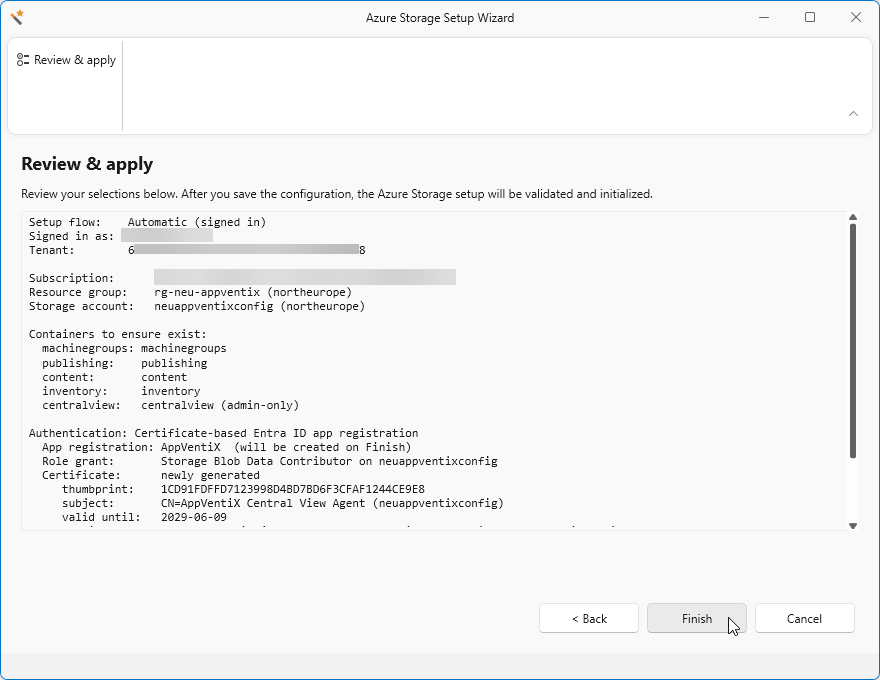
Click Finish to finalize the wizard. Some last configuration settings will be set and containers will be created.
Click Close.
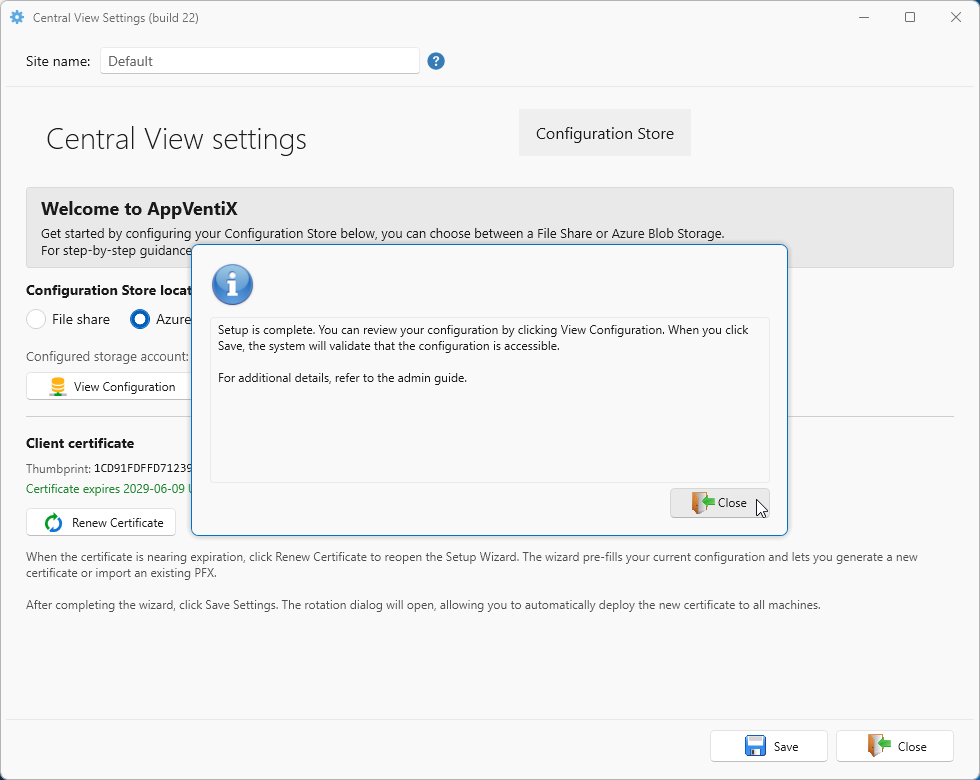
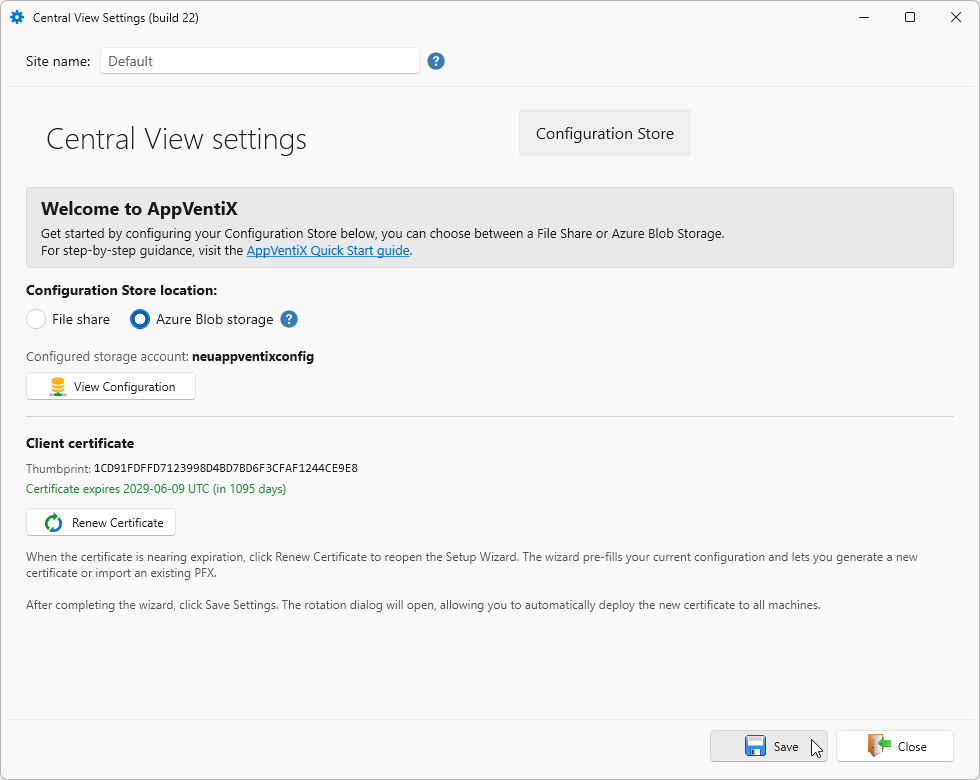
Click Save to start using this new configuration settings.
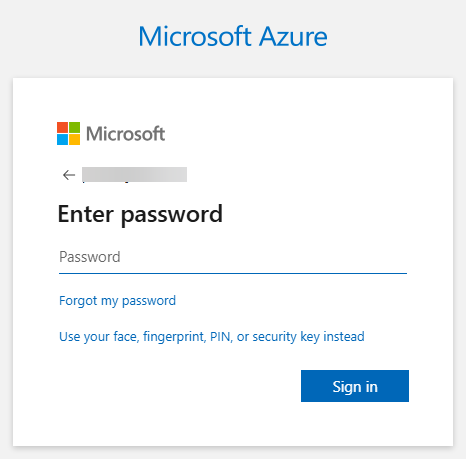
A popup may appear for you to login again. Enter your password and approve MFA if required.
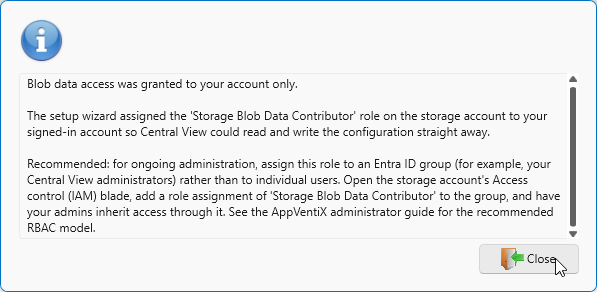
When the login is successful, a popup may appear, click Close
You are now ready for the next step.
Connect to Existing
If you already have an existing (pre-configured) storage account, or want to connect a new management machine to an existing storage account, you can use the manual connect option.
Click Connect to Existing to start the process.
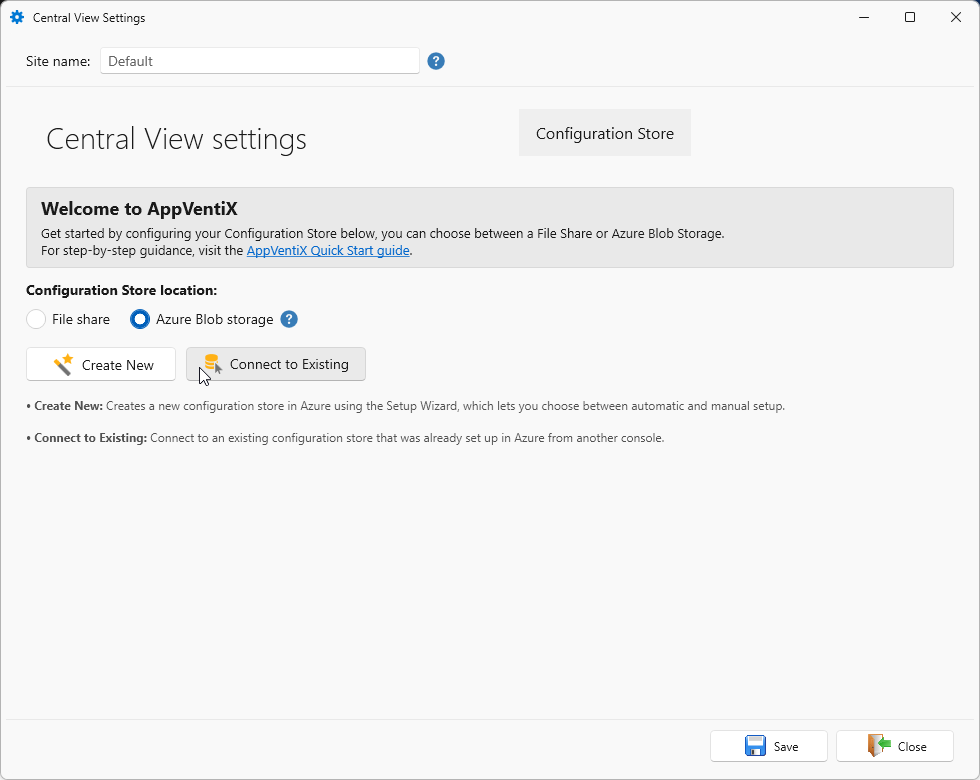
A browser popup may appear for you to sign in with your company credentials, log in. If you are already signed in, the login prompt will not be shown.
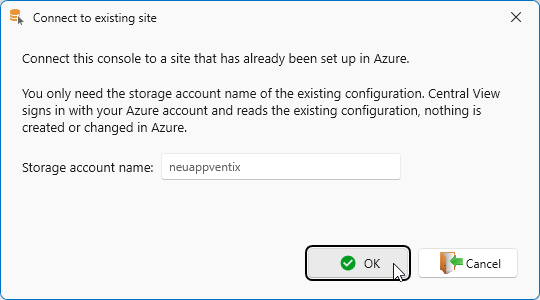
Enter the existing storage account name and click OK to continue.
When the storage account is found and the connection is made, you will be presented with a confirmation. Click Close to close this popup.
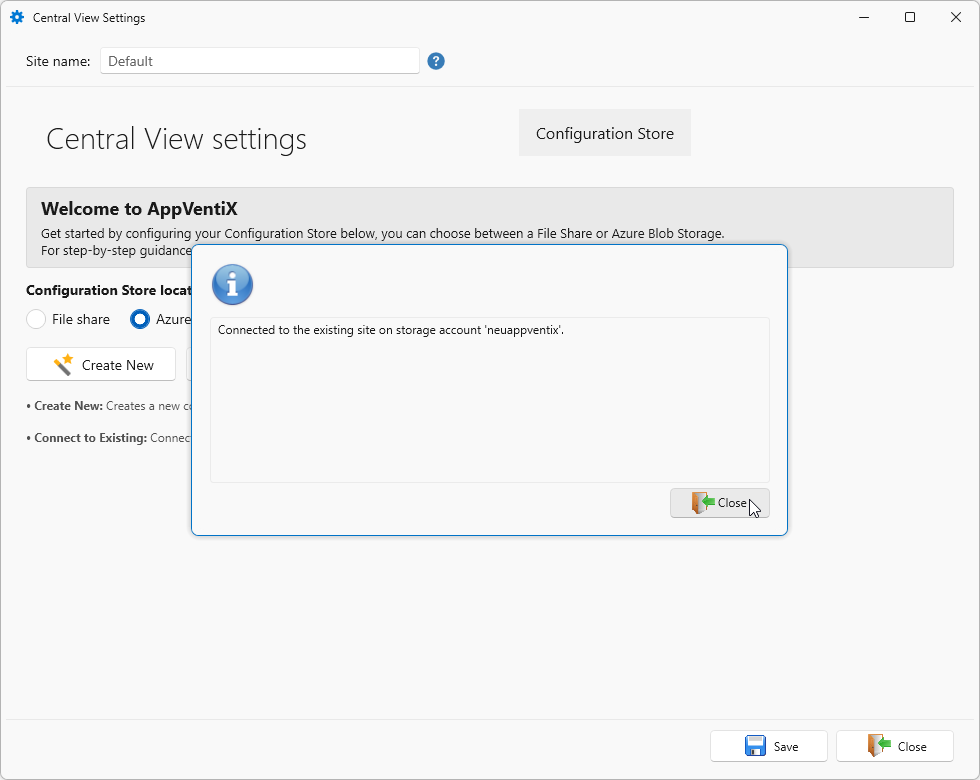
You are now ready for the next step.
Manual setup
In some situations you might not be able to run the automatic option to create a storage account. For example if another team manages the Azure platform. This procedure can than be followed to (pre) create the storage account and after which you can run the manual steps to connect to the newly created storage account.
First login to the Azure portal
Navigate to Storage accounts and click the + Create button.
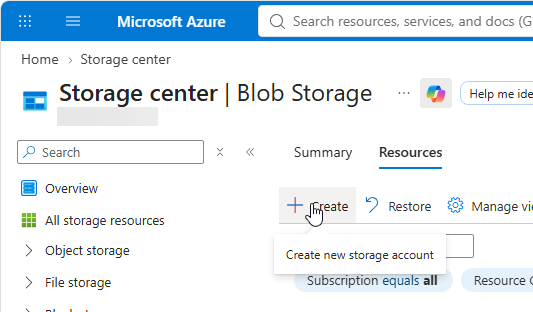
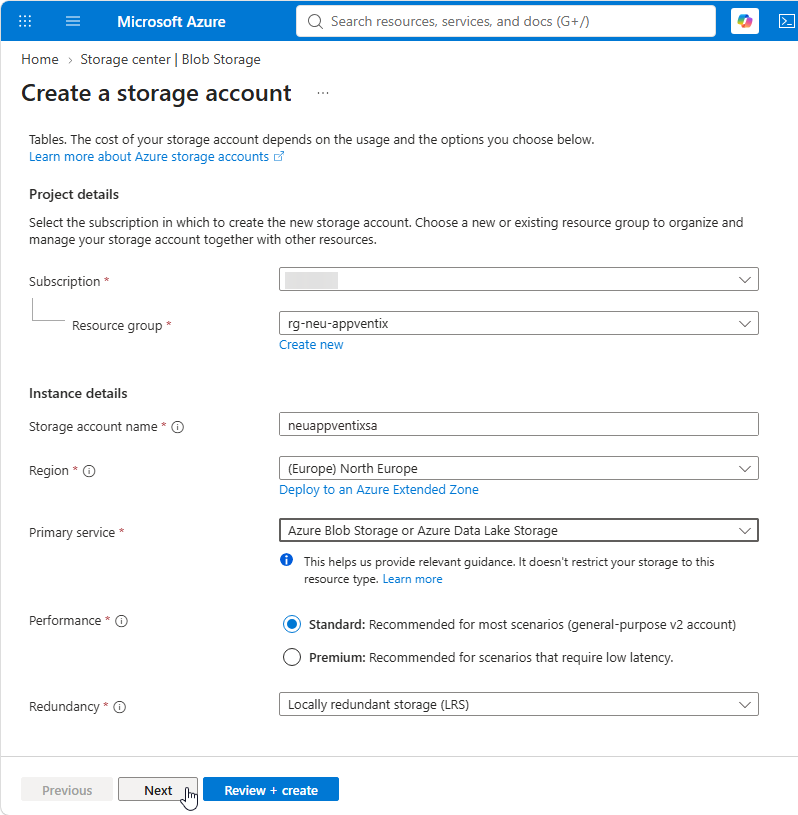
Select your Subscription where you want to create the new Storage Account. Select an existing resource group or create a new one. Enter your new Storage account name and Region. The Performance can be left at Standard. AppVentiX support can you in some cases instruct to change this to Premium Configure Primary service to Azure Blob Storage or Azure Data Lake Storage The Redundancy can be set to Locally redundant storage (LRS). Click Next
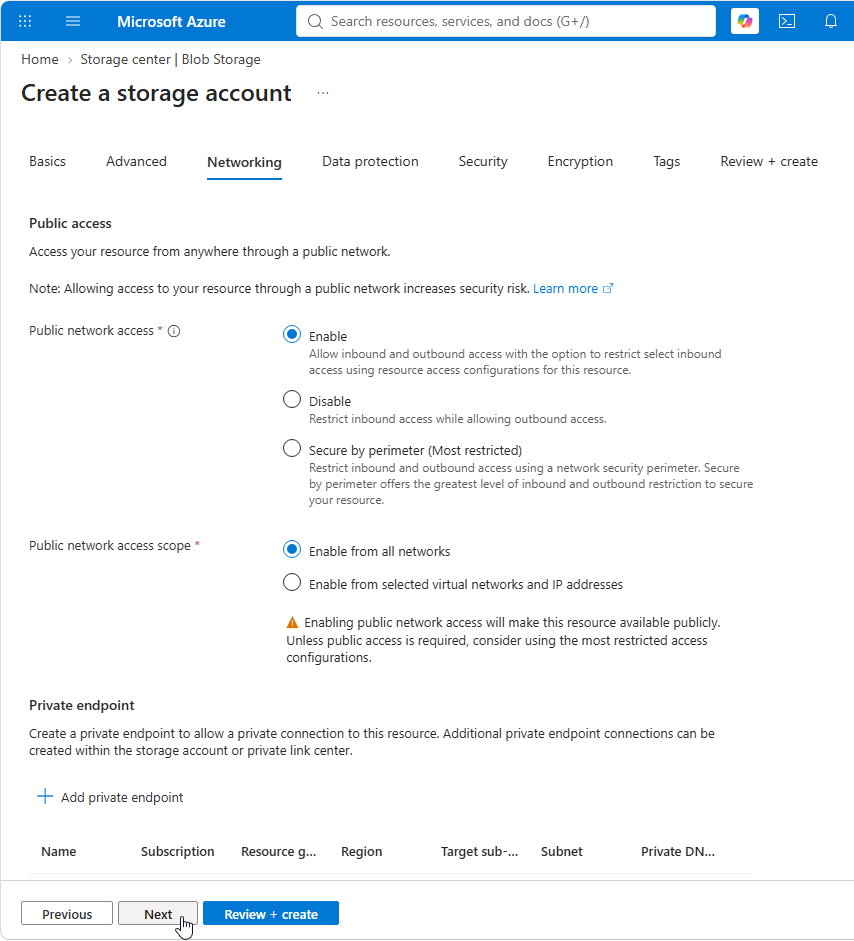
Advanced tab can be left to default values On the Networking tab, make sure that Public network access is enabled and Public network access scope is set to Enable from all networks. Without this setting, public devices line Laptops can not connect to the storage account. Leave Routing preference on Microsoft network routing
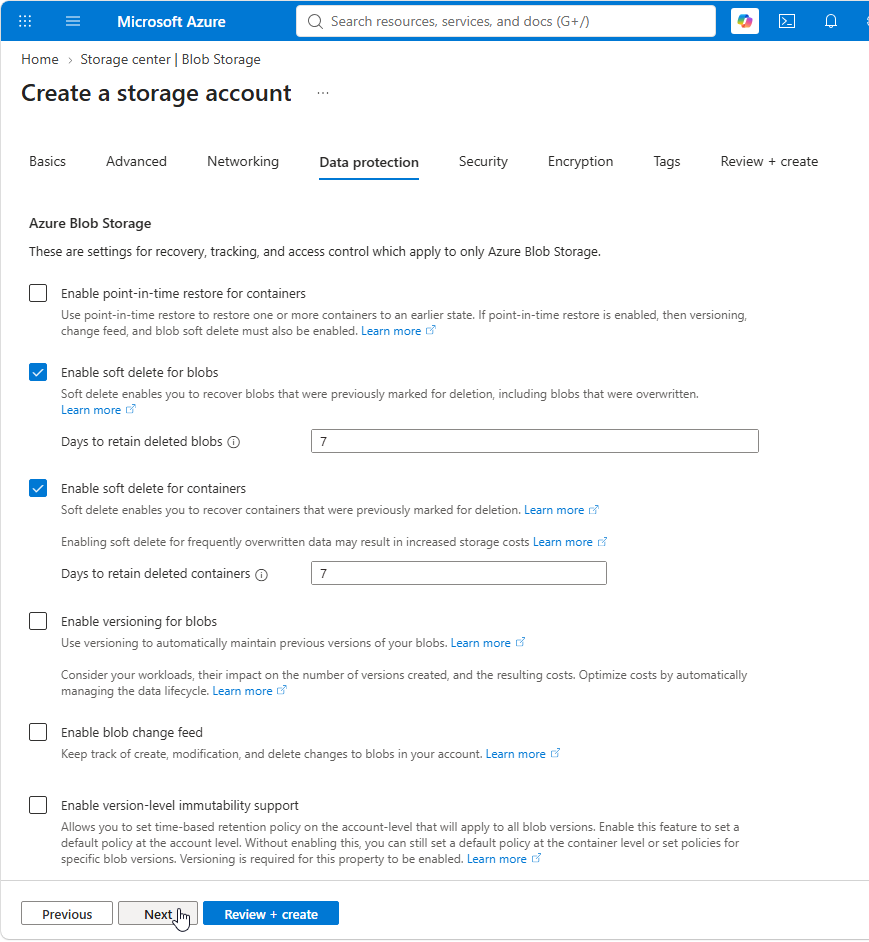
Make sure that on the Data Protection tab Days to retain deleted containers is set to 7 for - Enable soft delete for blobs * Days to retain deleted blobs
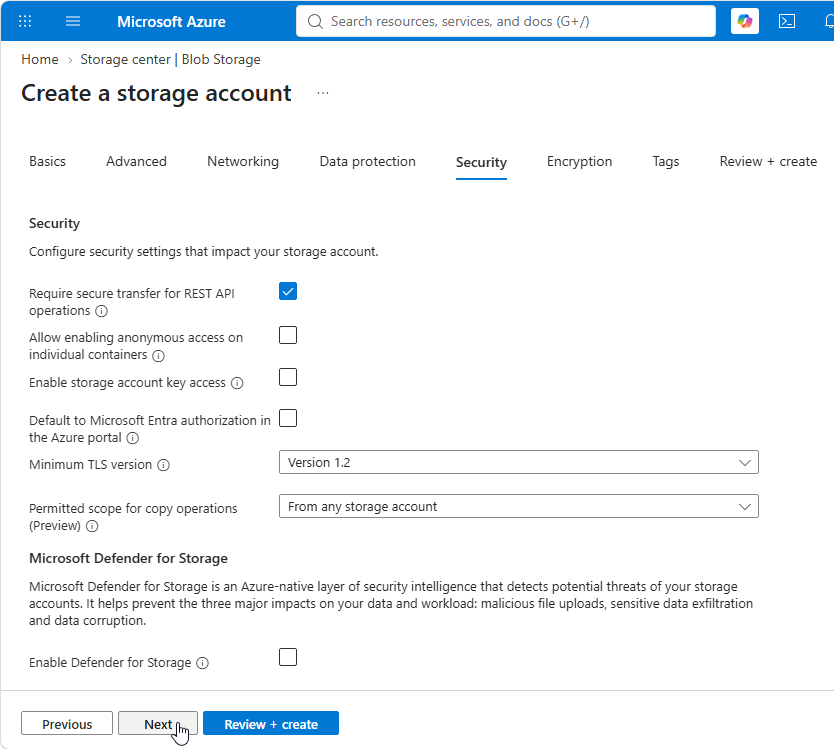
On the Security tab, make sure that Require secure transfer for REST API operations is checked. Rest can be left to default values.
You can leave the values on the default values on the Encryption tab.
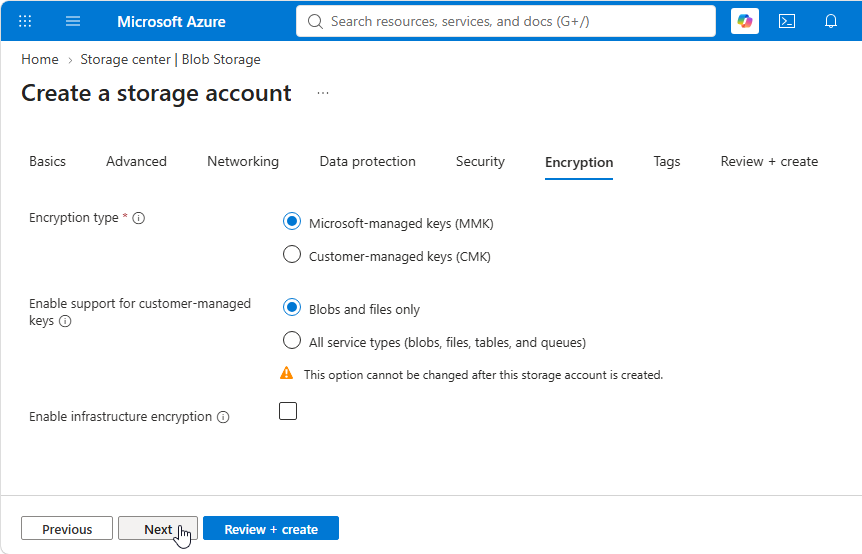
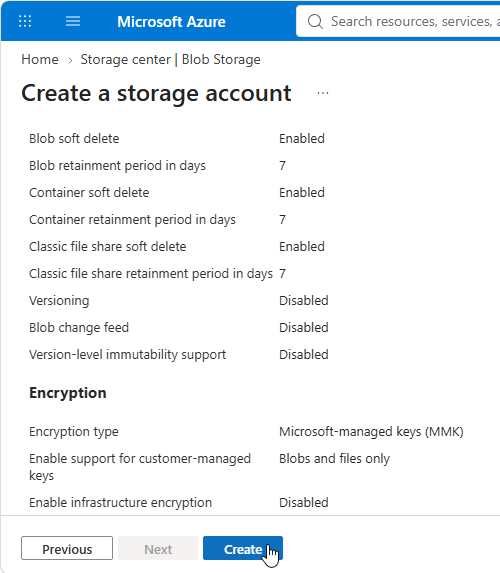
When there are no errors you can click Create to start creating the new storage account.
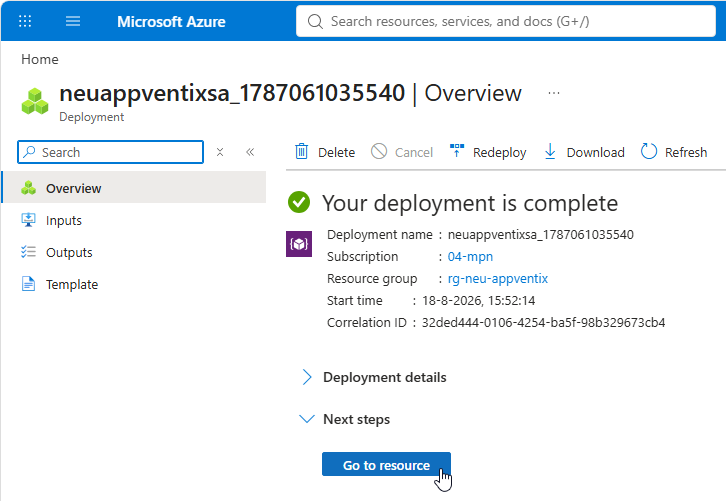
When the deployment is successful, you will receive a message. Click on Go to resource or browse to the new Storage Account.
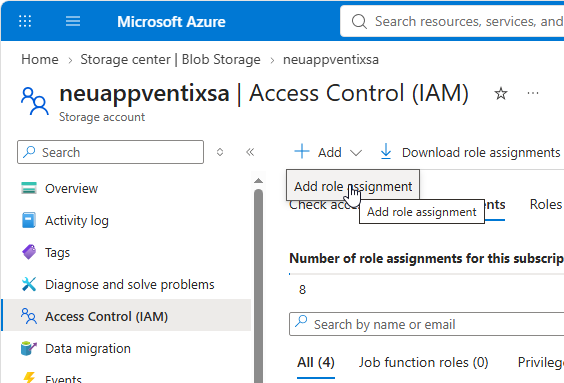
Next the user or a (user) Group for the Administrator role must be added to the storage account. Without this permission AppVentiX Central view cannot be managed. For more details or other scenarios visit this page You can set the admin permission on the storage account (globally) or set the Storage Account Data Reader globally and configure per container permissions.
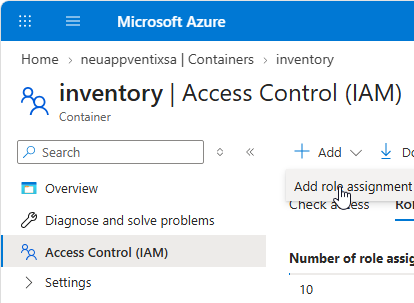
To add a role for your admin user, Click + Add and click Add role assignment in tme Account Control (IAM) section.
Search for and select the role Storage Blob Data Contributor. Click *Next.
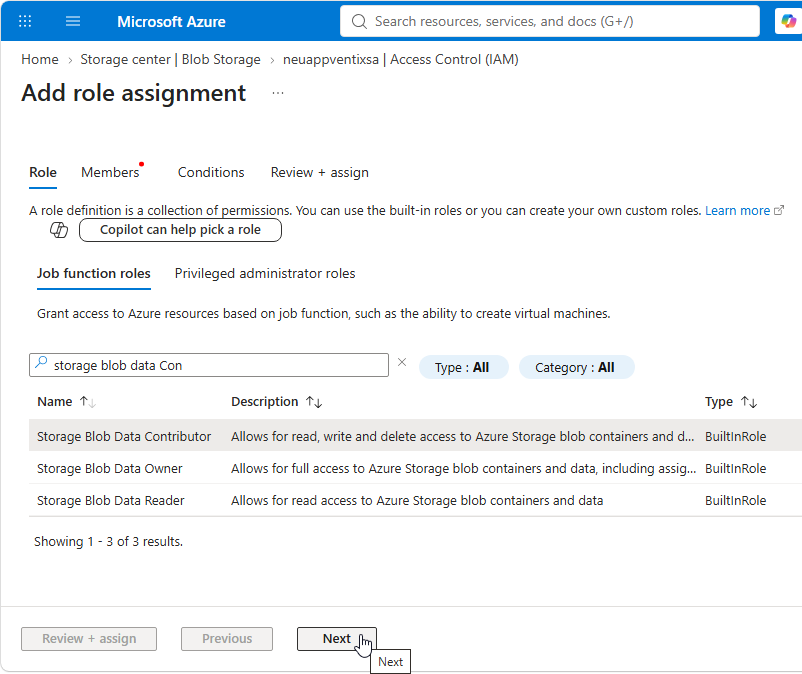
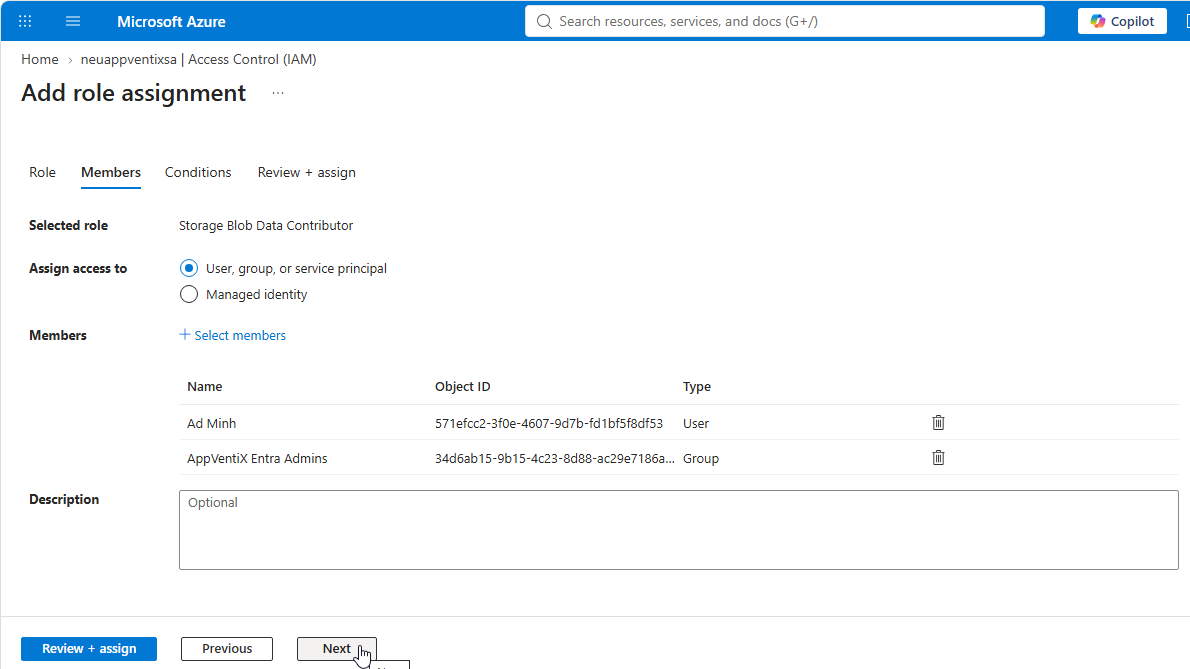
Select the members you want to assign. This can be one or more users or a Group.
Click *Next 2 times.
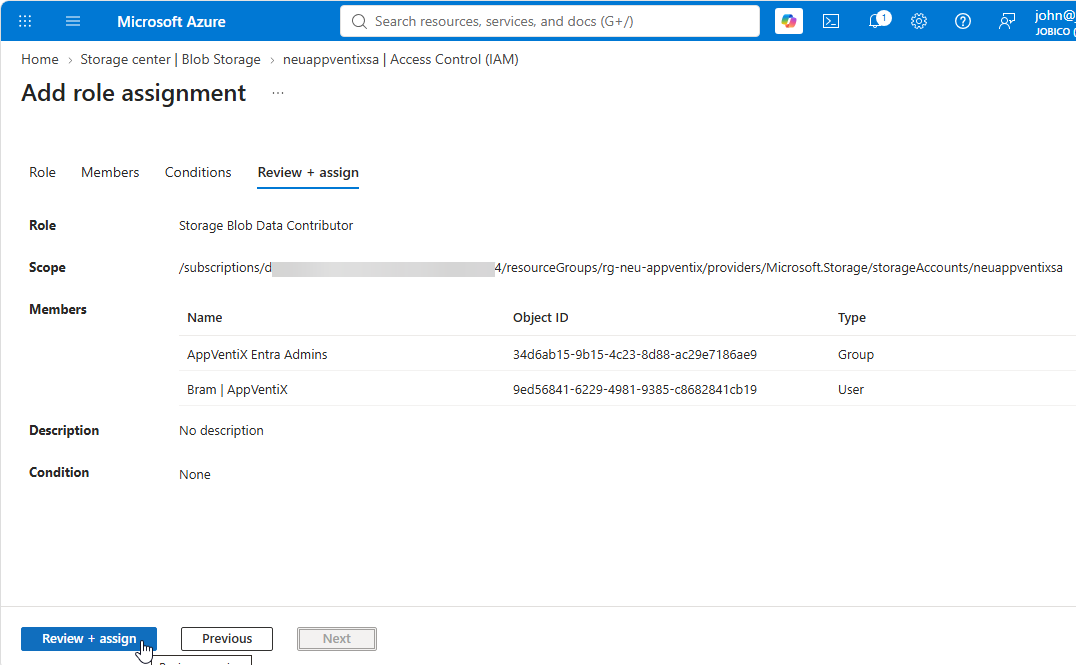
Click Review + assign
Next we need to create 5 containers. IN the left menu in the storage account, Expand Data storage and select Containers. Next click + Add container
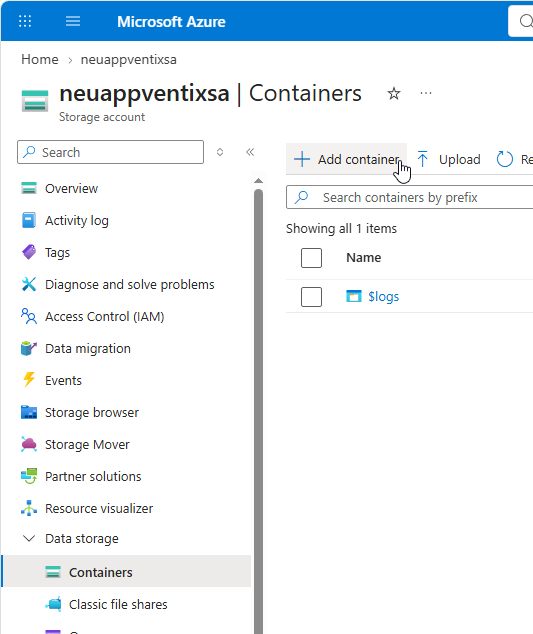
Enter the name machinegroups and click Create
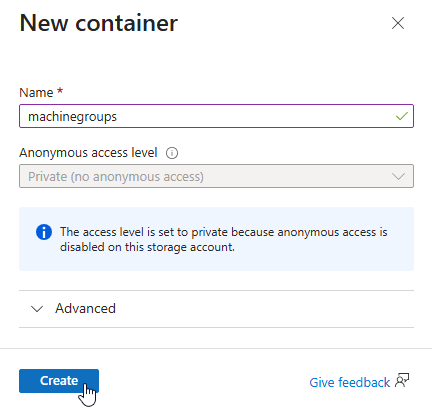
Repeat this process for the remaining 4 containers. And set the admin user permissions accordingly.
Important
Create the containers exactly as described with small caps and no spaces!
| Container Name | Permissions |
|---|---|
| machinegroups | Admin (user) - Storage Blob Data Contributor |
| publishing | Admin (user) - Storage Blob Data Contributor |
| content | Admin (user) - Storage Blob Data Contributor |
| inventory | Admin (user) - Storage Blob Data Contributor |
| centralview | Admin (user) - Storage Blob Data Contributor |
Note
If you want to assign RBAC roles, you can visit this page for more details.
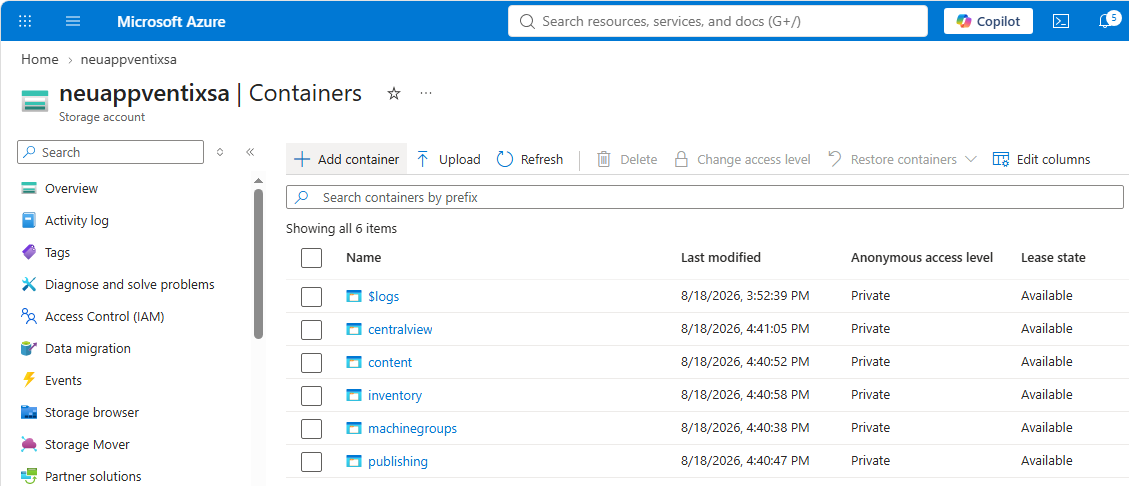
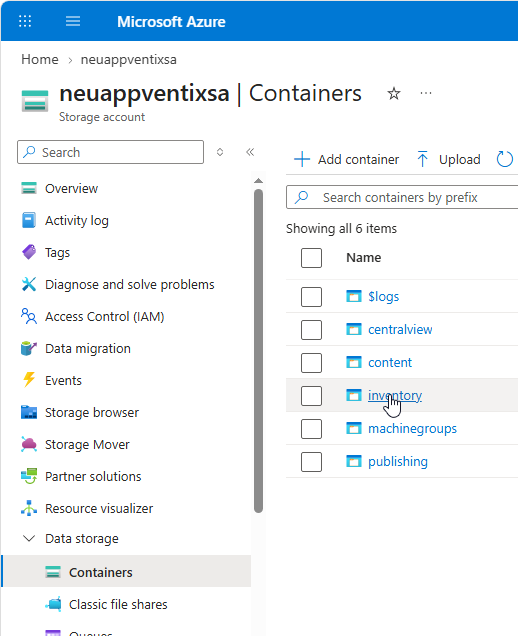
Select Containers in the Data Storage section. Select a container, for example inventory
Select Access Control (IAM) in the left menu, click the + Add button and select Add role assignment.
Configure the roles according to the following table. Repeat the process fo all the other containers listed in the table as well.
| Container Name | Permissions |
|---|---|
| machinegroups | Agent (machine) - Storage Blob Data Reader |
| publishing | Agent (machine) - Storage Blob Data Reader |
| content | Agent (machine) - Storage Blob Data Reader |
| inventory | Agent (machine) - Storage Blob Data Contributor (preferred) Or Storage Blob Data Reader for minimal permissions |
Go to App Registrations to create a new App Registration. The App registration is used for the agent to access the configuration store (read only) using certificate based authentication. Access to configuration and content is read-only, access to the inventory location (optional) is read and write.
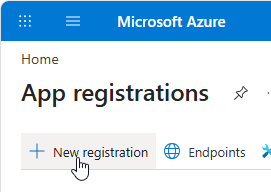
Click New registration
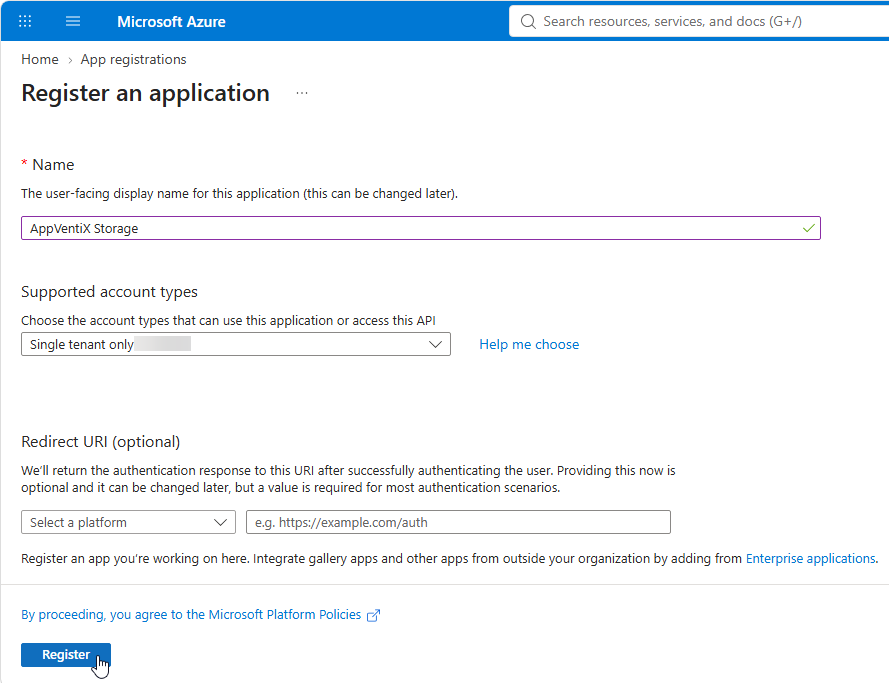
Give the App Registration a meaningful name. Single tenant only - xxx is good for most configurations. No Redirect URI is necessary. When finished click Register.
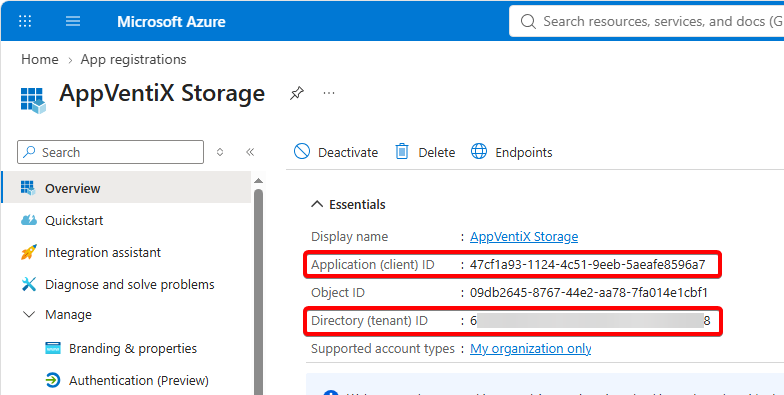
Copy the Application (client) ID and the Directory (tenant) ID values, we need these for the next steps.
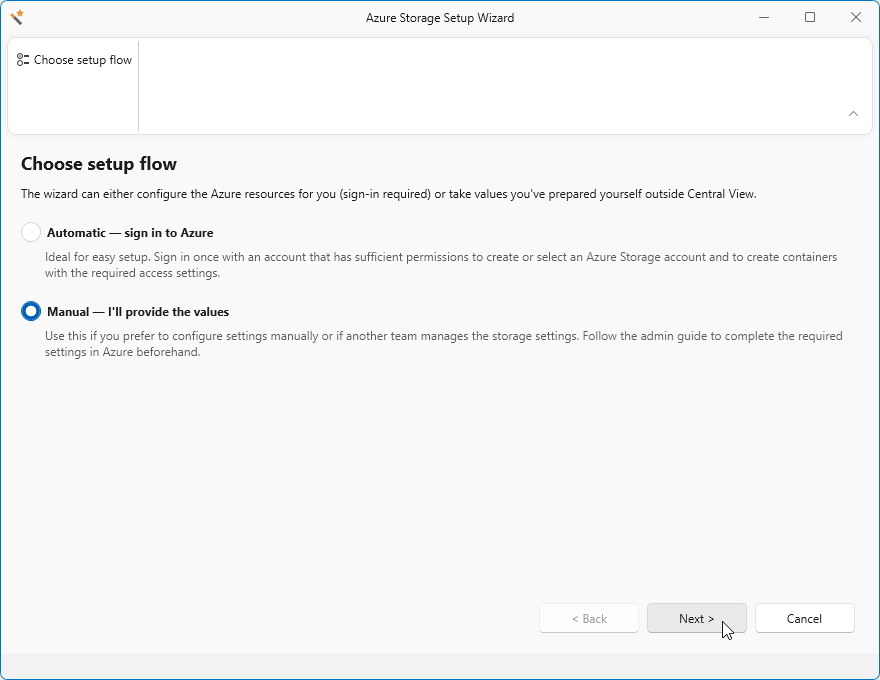
Switch back to the AppVentiX Central View settings wizard and select the Manual option. Click Next
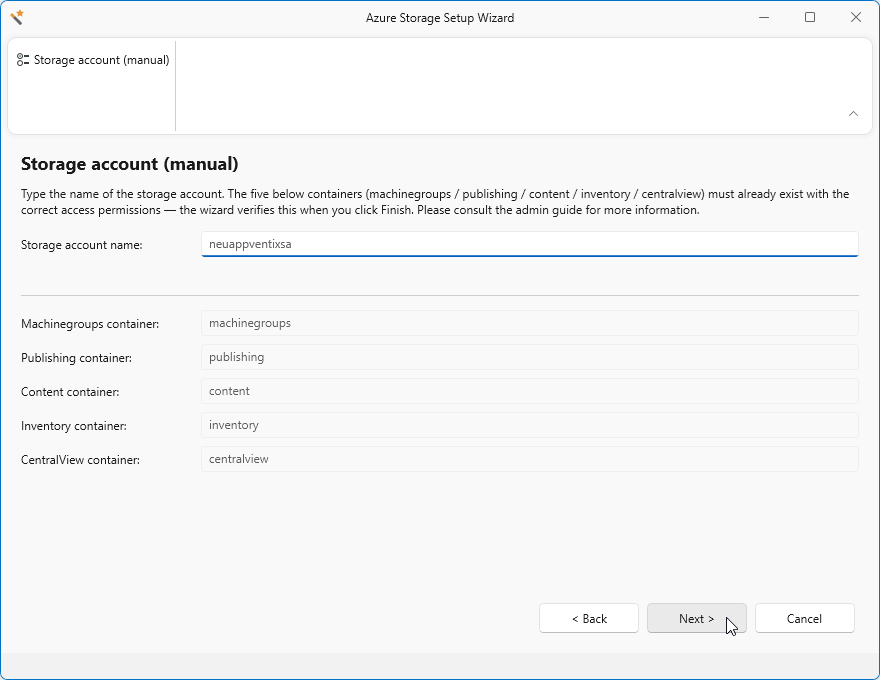
Enter the Storage account name exactly as created earlier and click Next.
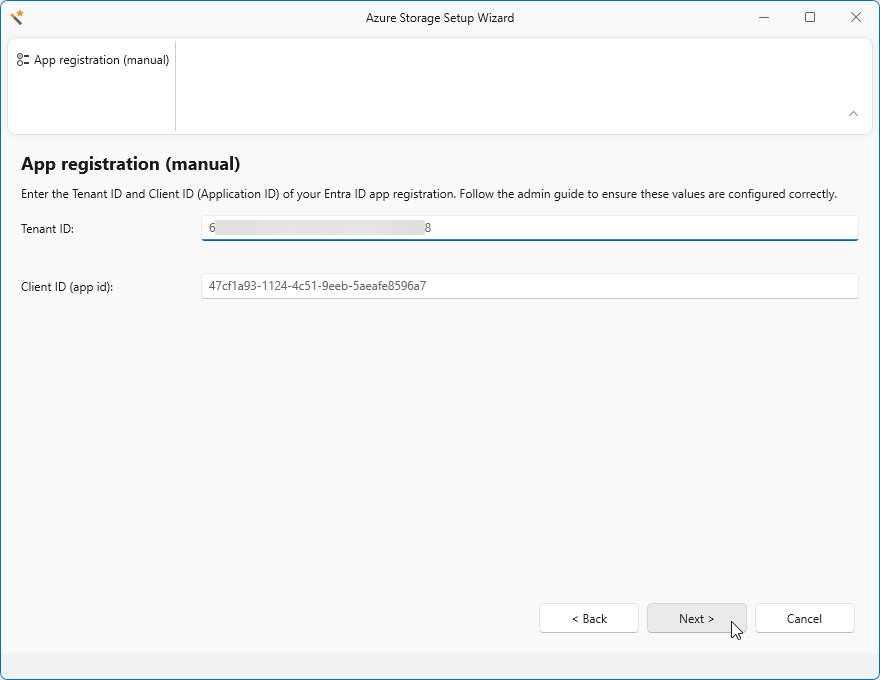
Enter the Tenant ID and Client ID values saved earlier. Click Next
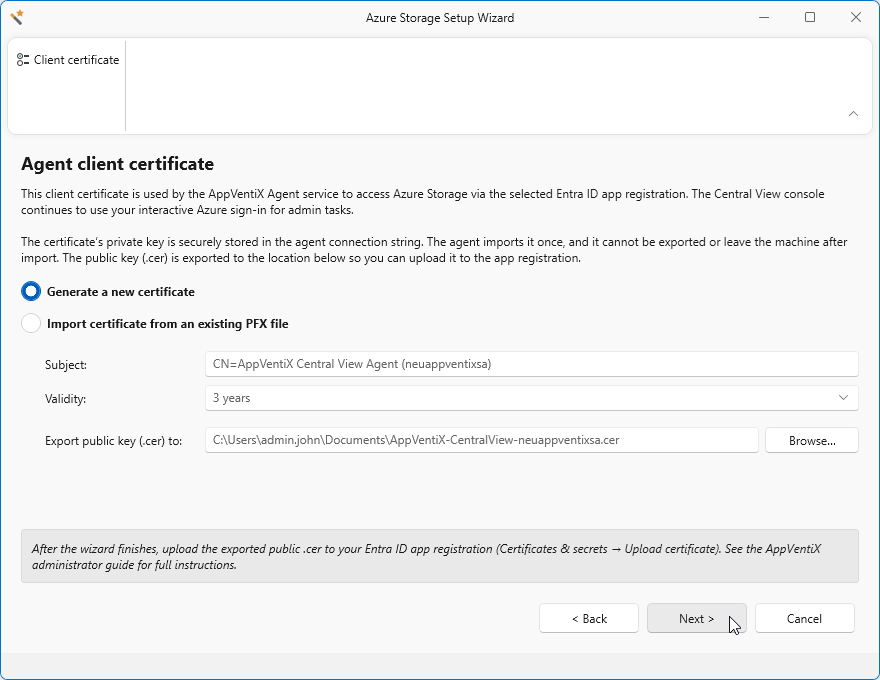
Select Generate a new certificate and optionally change the other values. You have the option to import your own pfx. Note the path here, we need this certificate for one of the next steps. Click Next.
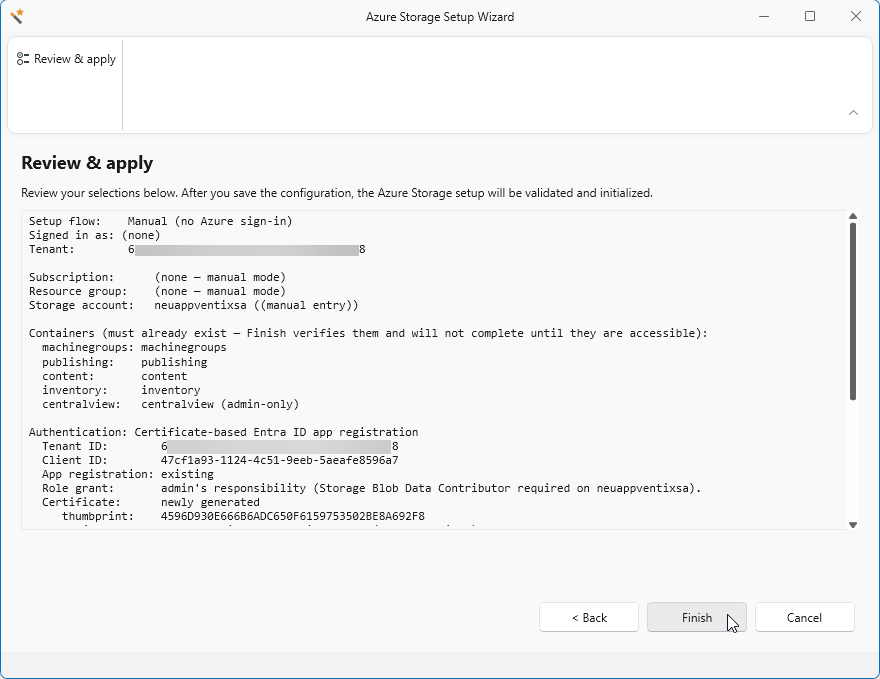
Click Finish
Note
You might have to login into Azure after clicking on Finish. Login with a admin account configured for access to the Storage account earlier.
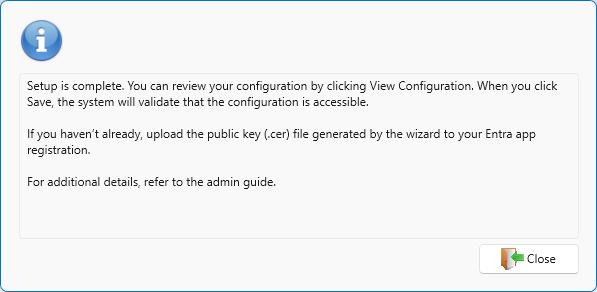
The AppVentiX Central View Storage account configuration is almost done. We now need to add the certificate to the App Registration first. You can click Close
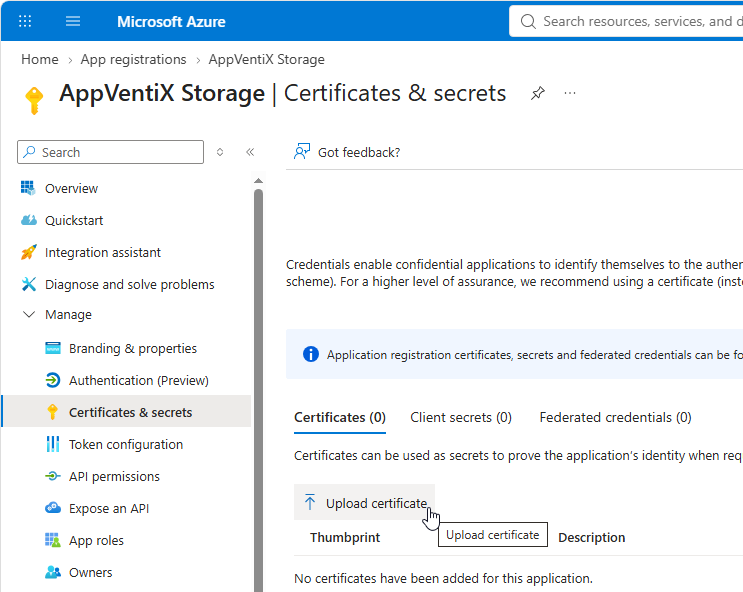
Navigate back to the App Registration we created earlier. Open the Manage menu and select Certificates & secrets. Select Certificates and click the Upload certificate button.
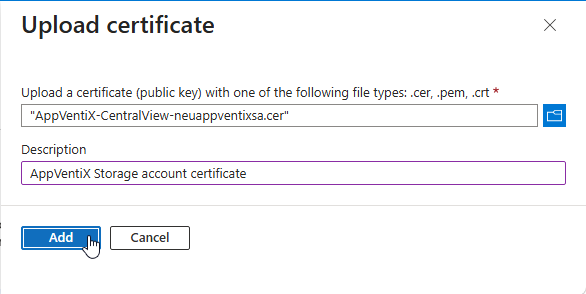
Select the certificate we created earlier and provide a Description. Click Add.
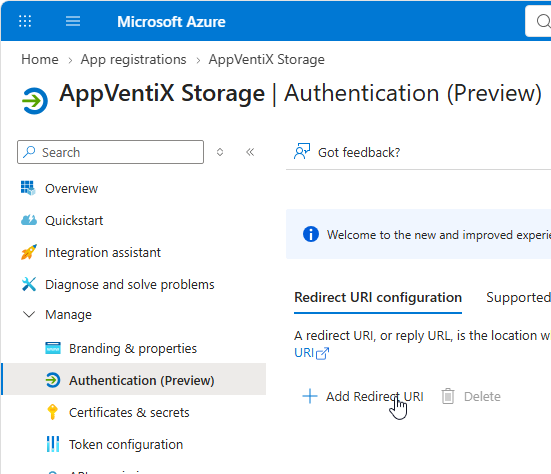
Select Authentication in the Manage section. Select Redirect URI Configuration and select + Add Redirect URI
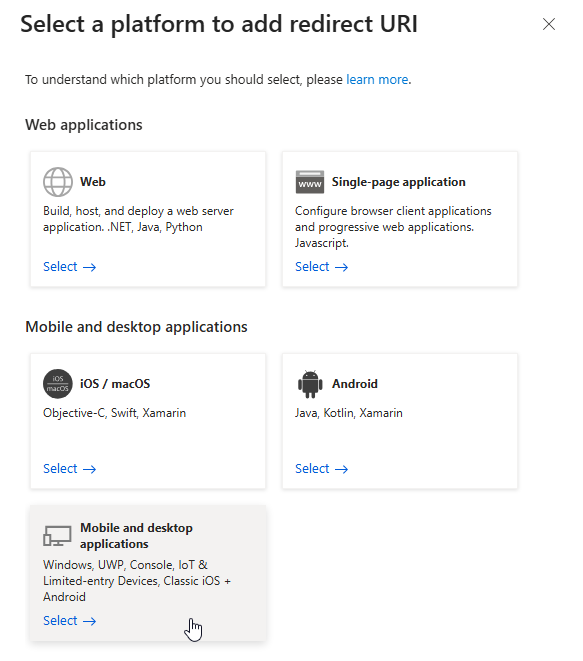
Next click the Mobile and desktop applications option.
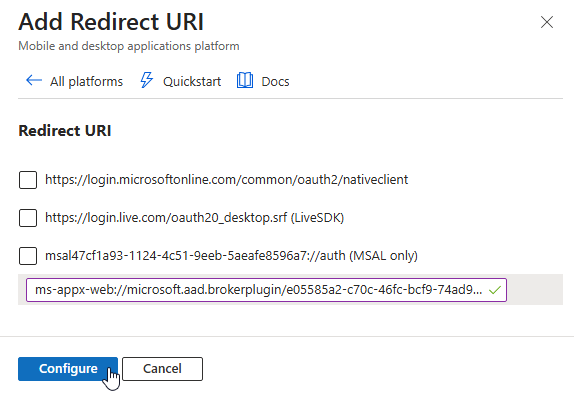
Enter the following value and click Configure when ready.
ms-appx-web://microsoft.aad.brokerplugin/e05585a2-c70c-46fc-bcf9-74ad966e2837
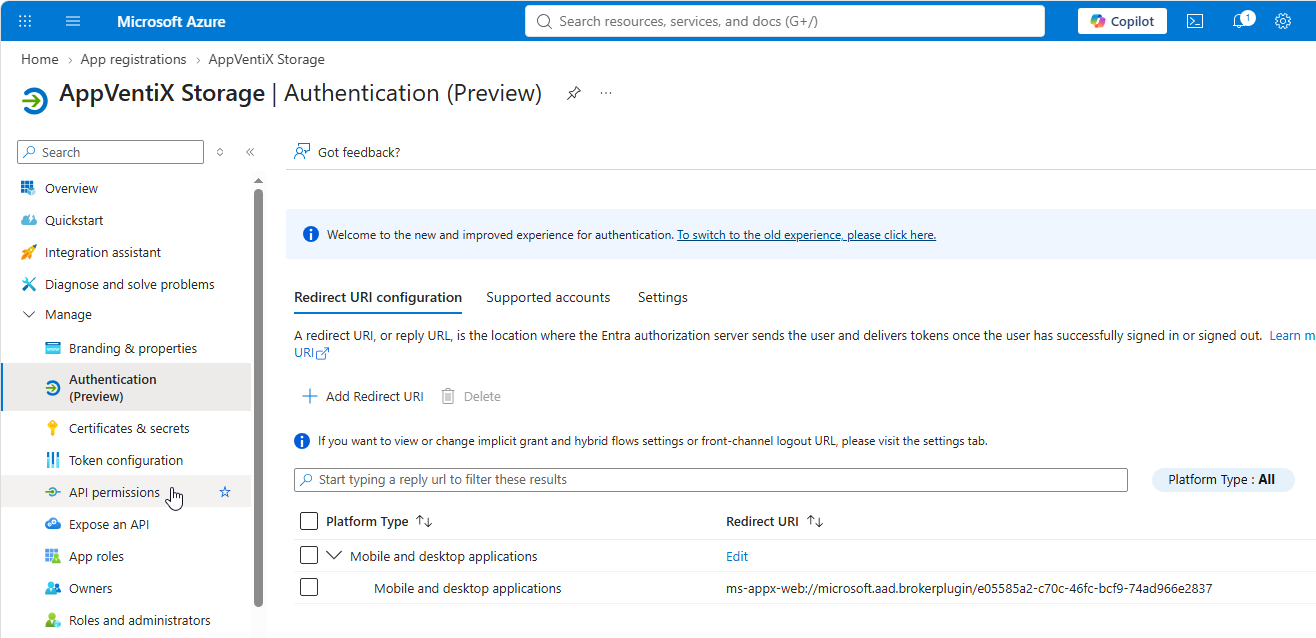
Navigate to API permissions.
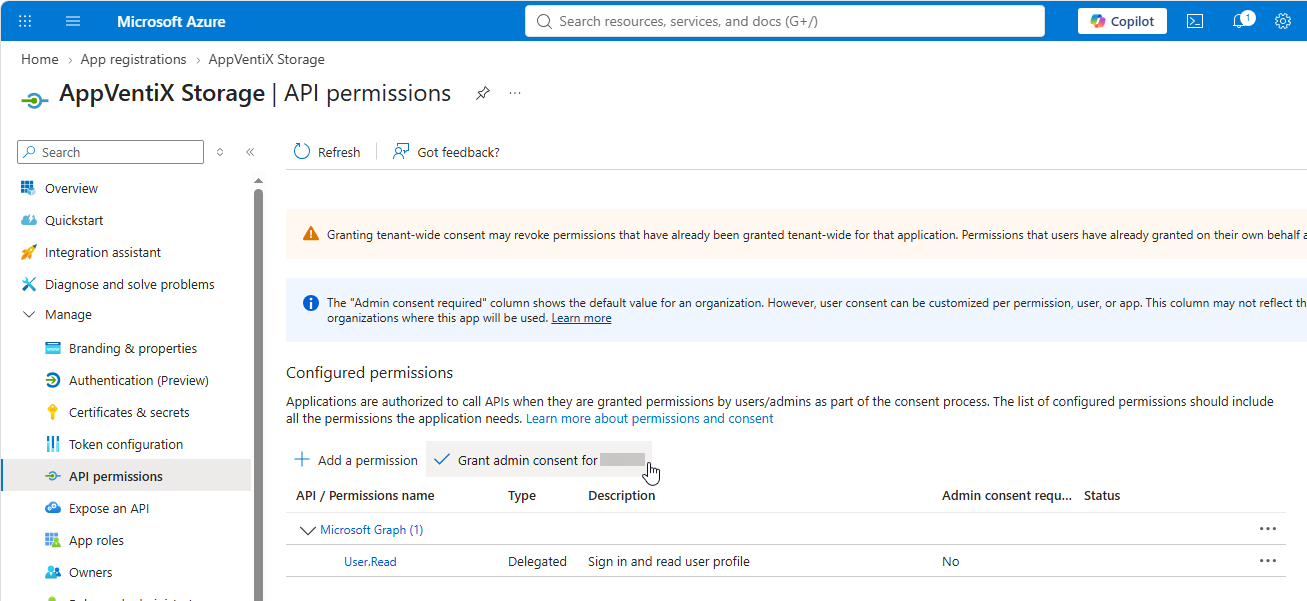
Click the Grant admin consent for AppVentiX Corp button
Click Yes.

Finally click Save in the AppVentiX Central View Settings wizard.